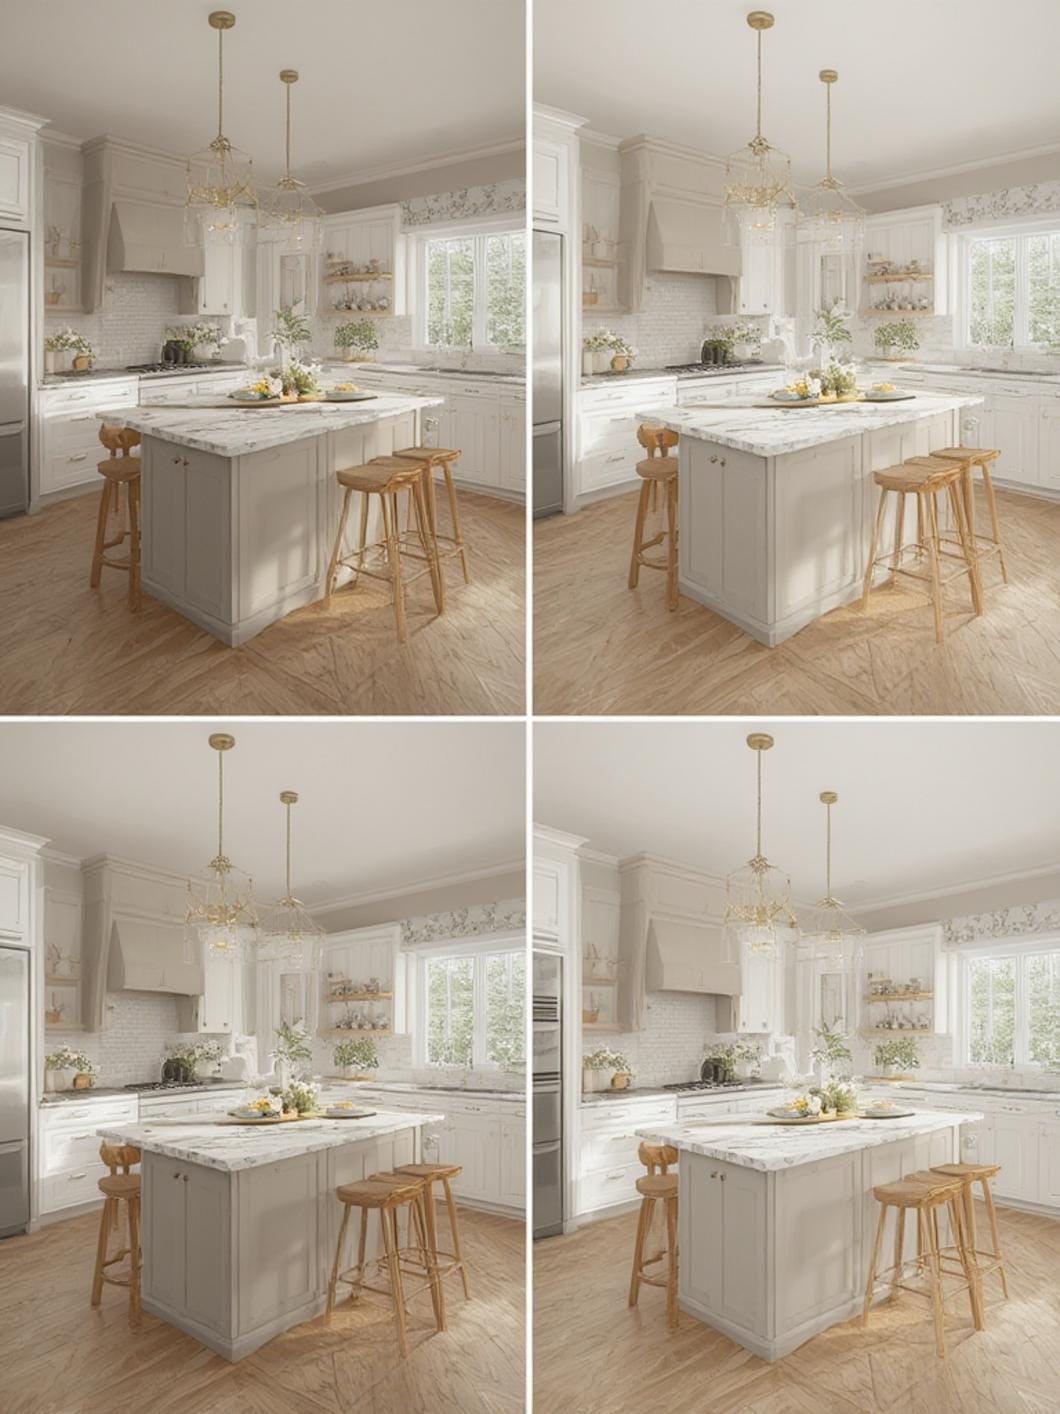
best 7 kitchen island lighting fixtures for your home
Your kitchen is the heart of your home, and the right lighting can transform it from merely functional to absolutely stunning. When it comes to creating ambiance, improving functionality, and adding a designer touch to your culinary space, nothing makes quite the statement like well-chosen Kitchen Island Lighting Fixtures. These focal point features don’t just illuminate your workspace—they define your kitchen’s entire aesthetic while providing essential task lighting for meal preparation, dining, and entertaining.
Table of Contents
Whether you’re renovating your entire kitchen or simply looking to refresh the space with a single impactful change, selecting the right Kitchen island pendant lights can elevate your design scheme while enhancing the practical usability of this central gathering spot.
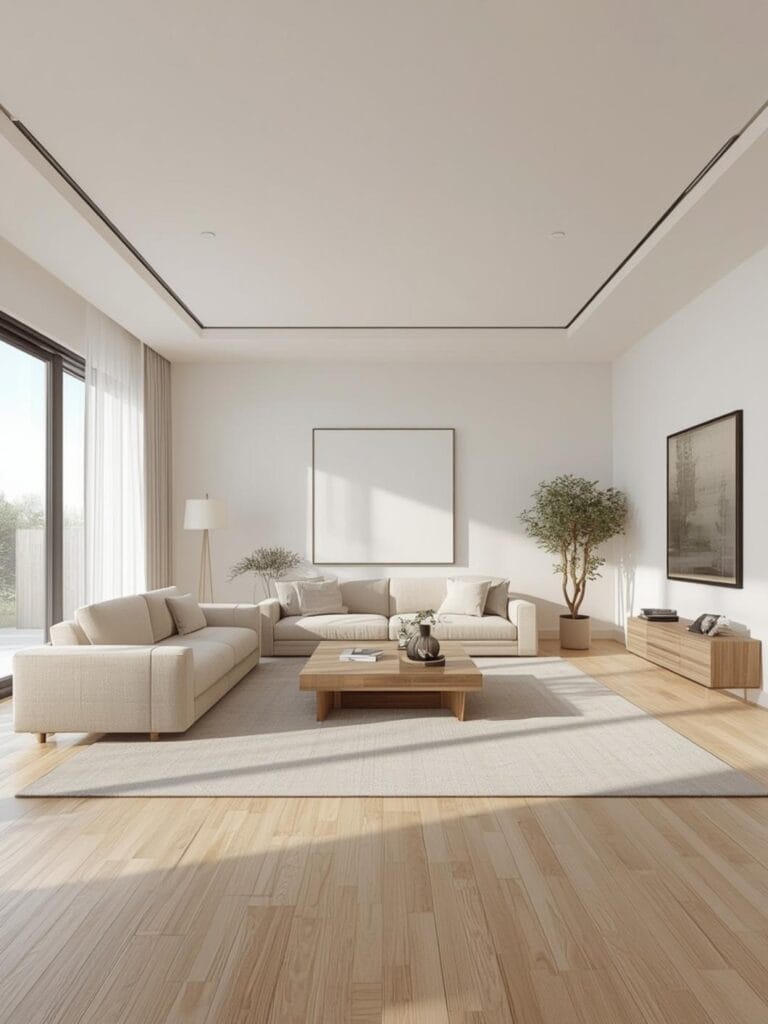
The beauty of kitchen island lighting lies in its versatility. From sleek modern pendants to rustic farmhouse chandeliers, from industrial cage lights to glamorous crystal fixtures, there’s a lighting solution that perfectly complements your personal style and architectural elements. This comprehensive guide will walk you through everything you need to know about selecting, planning, and installing kitchen island lighting that not only looks spectacular but also functions flawlessly for years to come.
Materials & Decor Elements
Before beginning your kitchen island lighting project, gather these essential materials and consider these decor elements:
Lighting Fixtures:
– Pendant lights (typically 2-3 for standard islands)
– Chandelier or linear suspension fixture (alternative option)
– Matching or complementary finish hardware
– Appropriate bulbs (LED recommended for energy efficiency)
Installation Materials:
– Ceiling junction box (rated for fixture weight)
– Electrical wire and wire nuts
– Mounting hardware (usually included with fixtures)
– Ceiling medallion or canopy (for finished look)
– Wire stripper and electrical tape
– Voltage tester
Tools Required:
– Ladder or step stool
– Screwdriver set (flathead and Phillips)
– Drill with appropriate bits
– Measuring tape
– Pencil for marking
– Level
– Stud finder
– Wire cutters/strippers
Safety Equipment:
– Safety glasses
– Work gloves
– Circuit breaker lock or tag
Complementary Decor Elements:
– Coordinating cabinet hardware
– Matching faucet finish
– Decorative island accessories
– Area rug to define the space
– Bar stools with complementary style
Timing / Project Planning
Proper planning ensures your kitchen island lighting project proceeds smoothly without disrupting your daily routine unnecessarily.
Research and Selection Phase (1-2 weeks):
– Browse design inspiration on Pinterest, Houzz, and interior design websites
– Measure your island dimensions and ceiling height
– Determine your budget range ($100-$2,000+ depending on fixtures)
– Visit lighting showrooms and home improvement stores
– Order fixtures (allow 1-2 weeks for delivery)
Preparation Phase (1-2 hours):
– Clear the island and surrounding area
– Turn off electricity at the circuit breaker
– Remove existing fixtures if applicable
– Inspect existing electrical box and wiring
– Determine if professional electrician consultation is needed
Installation Phase (2-4 hours for DIY, 1-2 hours for professional):
– Install electrical boxes at proper locations
– Mount fixture canopies or mounting brackets
– Connect wiring according to fixture instructions
– Secure fixtures and adjust heights
– Install light bulbs and test functionality
Styling and Final Adjustments (30 minutes – 1 hour):
– Fine-tune pendant heights for visual balance
– Clean fixtures and surrounding area
– Arrange complementary decor elements
– Photograph and document your finished project
Total Project Timeline: Plan for 2-3 weeks from concept to completion, with most of that time dedicated to thoughtful selection and waiting for fixture delivery. The actual hands-on work typically requires just one afternoon for confident DIYers.
Step-by-Step Instructions
Follow these detailed steps to successfully install your Kitchen Island Lighting Fixtures and achieve professional-looking results:
Step 1: Measure and Plan Placement
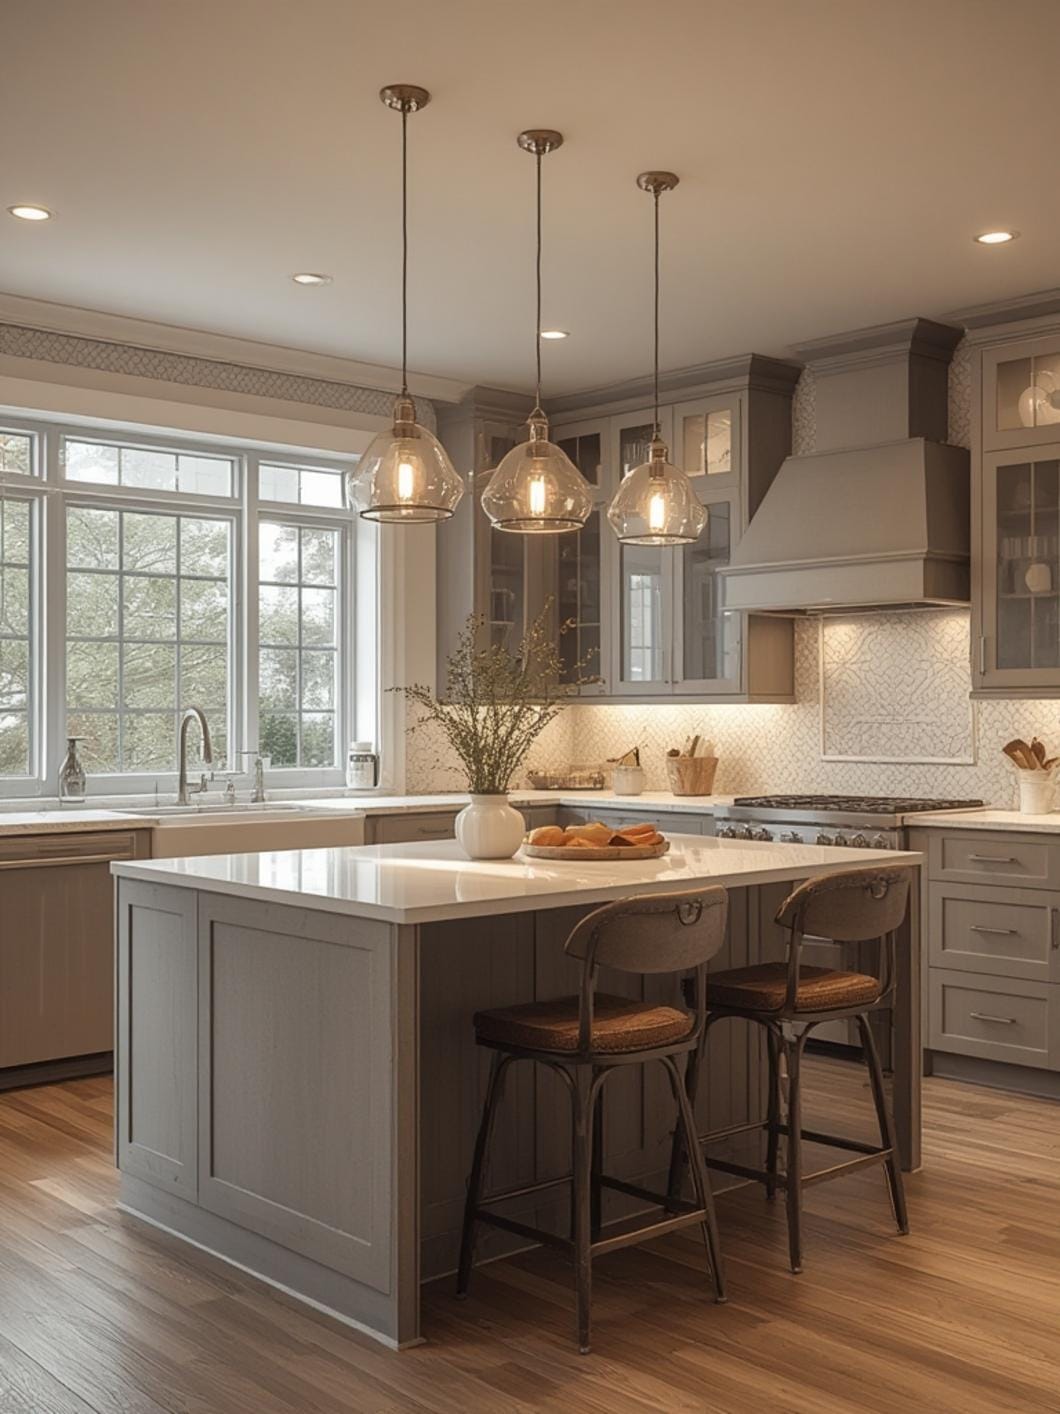
Measure your island length and width. For pendant lights, plan to space them evenly with 30-36 inches between each fixture. The center of each pendant should hang 30-36 inches above the island surface. For islands under 6 feet, two pendants typically suffice; for longer islands, three or more create better balance.
Step 2: Turn Off Power and Verify
Locate the appropriate circuit breaker and turn off power to the kitchen lighting circuit. Use a voltage tester to confirm power is completely off at the existing fixture or junction box. This critical safety step prevents electrical shock during installation.
Step 3: Mark Installation Points
Using your measurements, mark the ceiling locations where your Kitchen island pendant lights will hang. Use a pencil to create small marks, then verify placement using a level to ensure they’re properly aligned. Stand back and visualize the spacing before proceeding.
Step 4: Install Junction Boxes (if needed)
If you’re adding new lighting locations, you’ll need to install ceiling junction boxes. This step may require cutting drywall and running new electrical wire, which is when many homeowners choose to consult a licensed electrician. Ensure boxes are securely mounted to ceiling joists and rated for your fixture’s weight.
Step 5: Assemble Fixture Components
Before mounting, assemble as much of each fixture as possible on a work surface. Thread wires through canopies and decorative rods, attach mounting brackets to canopies, and familiarize yourself with the manufacturer’s specific instructions. This preparation makes ceiling work much easier.
Step 6: Connect Electrical Wiring
With power confirmed off, connect the fixture wires to the house wiring. Typically, this means connecting black to black (hot), white to white (neutral), and green or bare copper to the ground wire. Secure connections with wire nuts and wrap with electrical tape. Tuck wires neatly into the junction box.
Step 7: Mount the Fixtures
Secure the mounting bracket or canopy to the junction box using the provided screws. Ensure everything is tight and stable. For heavier fixtures like chandeliers, verify that your junction box is properly braced and rated for the weight.
Step 8: Adjust Height and Styling
Most pendant fixtures allow height adjustment via a rod system or adjustable cord. Set each pendant to hang 30-36 inches above the island surface, adjusting slightly based on your ceiling height and personal preference. Ensure all pendants hang at the same height for a cohesive look.
Step 9: Install Bulbs and Test
Install the appropriate bulbs according to manufacturer specifications. LED bulbs are recommended for energy efficiency and longevity. Restore power at the circuit breaker and test the switch. Check that all fixtures illuminate properly and no flickering occurs.
Step 10: Final Adjustments and Styling
Make any final height or positioning adjustments. Clean the fixtures with appropriate cleaner. Style your island with complementary accessories that don’t interfere with the lighting’s functionality. Step back and admire your dramatically transformed kitchen space.
Benefits / Advantages
Installing the right kitchen island lighting provides numerous aesthetic and functional advantages that justify the investment:
Enhanced Task Lighting: Properly positioned fixtures eliminate shadows and dark spots on your work surface, making food preparation safer and more enjoyable. The focused illumination improves visibility for detailed tasks like chopping vegetables or reading recipes.
Architectural Drama: Statement lighting fixtures serve as functional art pieces that draw the eye upward, creating visual interest and making your ceiling feel higher. This vertical emphasis adds architectural dimension to even modest kitchens.
Property Value Increase: Updated lighting fixtures are one of the most cost-effective upgrades for increasing home value. Real estate professionals consistently note that kitchens with attractive lighting sell faster and command higher prices.
Defined Space Zones: Island lighting creates a natural boundary that defines the kitchen zone within open-concept floor plans, establishing spatial hierarchy without physical barriers.
Ambient Atmosphere: Dimmable fixtures allow you to adjust lighting levels from bright task lighting during meal prep to soft ambient glow during dinner parties or late-night conversations, adapting to various activities and moods.
Energy Efficiency: Modern LED fixtures consume significantly less electricity than traditional options while producing superior light quality. This translates to lower utility bills and reduced environmental impact.
Personal Expression: Your lighting choices reflect your design sensibility, whether that’s minimalist modern, cozy farmhouse, industrial chic, or glamorous traditional. Few elements make such a bold style statement.
Improved Functionality: Beyond aesthetics, strategic lighting placement reduces eye strain, minimizes accidents caused by poor visibility, and makes kitchen tasks more pleasant and efficient.
Tips, Alternatives, Styling Advice
Customize your kitchen island lighting approach based on budget, space constraints, and personal preferences:
Budget-Friendly Alternatives:
– Shop discount retailers like HomeGoods or TJ Maxx for designer-look fixtures at fraction of boutique prices
– Consider DIY fixture makeovers using spray paint to update thrift store finds
– Install track lighting as an adjustable, cost-effective alternative to multiple pendant fixtures
– Use Edison-style bulbs in simple socket fixtures for industrial charm without high cost
Small Kitchen Solutions:
– Choose mini pendants (8-10 inches in diameter) to avoid overwhelming compact islands
– Opt for glass or open-frame fixtures that don’t visually clutter limited space
– Consider a single linear fixture rather than multiple pendants
– Select fixtures with upward light components to make low ceilings feel higher
Style-Specific Recommendations:
– Modern/Contemporary: Geometric shapes, metallic finishes, sleek lines, minimal ornamentation
– Farmhouse/Rustic: Wood elements, mason jar styles, distressed finishes, vintage-inspired Edison bulbs
– Industrial: Exposed hardware, metal cages, black or bronze finishes, factory-inspired designs
– Traditional: Crystal elements, ornate details, brass or nickel finishes, chandelier-style fixtures
– Coastal: Glass globes, rope details, weathered finishes, light and airy designs
Mixing Metals Successfully:
Don’t feel constrained to match every metal finish perfectly. Current design trends embrace mixing metals when done thoughtfully. Choose one dominant metal (appearing in 60-70% of visible hardware) and one or two accent metals to create sophisticated visual interest.
Coordinating with Existing Elements:
Consider how your lighting finish relates to cabinet hardware, faucets, appliances, and range hoods. While exact matching isn’t necessary, complementary finishes create cohesion throughout the space.
Dimmer Switch Installation:
Always install dimmer switches compatible with your bulb type (especially important for LED fixtures which require specific LED-compatible dimmers). This simple addition exponentially increases your lighting’s versatility.
Layered Lighting Approach:
Don’t rely solely on island pendants. Combine them with recessed ceiling lights, under-cabinet lighting, and accent lighting for a professional, well-lit kitchen that accommodates all activities and times of day.
Common Mistakes to Avoid
Sidestep these frequent errors to ensure your lighting project succeeds beautifully:
Mistake 1: Incorrect Fixture Sizing
Choosing pendants that are too large or too small for your island creates visual imbalance. Solution: Follow the guideline that pendant diameter should be approximately one-third to one-quarter of your island width. For a 36-inch wide island, select 9-12 inch diameter pendants.
Mistake 2: Improper Hanging Height
Fixtures hung too low obstruct sight lines and create head-bumping hazards, while those too high fail to provide adequate task lighting. Solution: Maintain the standard 30-36 inches from island surface to bottom of fixture, adjusting slightly for very high or very low ceilings.
Mistake 3: Poor Spacing Calculations
Unevenly spaced fixtures or those positioned too close together or too far apart look unprofessional. Solution: Calculate exact center points, ensuring equal distance between fixtures and equal distance from island ends. Use painter’s tape on the ceiling to visualize placement before installation.
Mistake 4: Ignoring Switch Placement
Installing beautiful fixtures controlled by an inconveniently located switch diminishes functionality. Solution: Verify switch placement allows easy access from the kitchen’s main entry point. Consider adding smart switches for voice or app control.
Mistake 5: Mismatched Style Elements
Selecting lighting that clashes with your kitchen’s overall design aesthetic creates visual discord. Solution: Identify your kitchen’s predominant style (modern, traditional, transitional, etc.) and select fixtures that harmonize with architectural details, cabinetry, and finishes.
Mistake 6: Inadequate Light Output
Choosing fixtures purely for aesthetics without considering their actual illumination capacity results in a dim, poorly lit workspace. Solution: Calculate required lumens based on island size (aim for 35-50 lumens per square foot for task areas), and select fixtures that accommodate appropriately bright bulbs.
Mistake 7: Forgetting About Bulb Temperature
Different color temperatures create dramatically different atmospheres. Solution: For kitchens, choose bulbs in the 2700K-3000K range (warm white) for inviting ambiance, or 3500K-4100K (neutral white) for crisp, energizing light.
Mistake 8: DIY Beyond Skill Level
Attempting complex electrical work without proper knowledge risks safety hazards and code violations. Solution: Honestly assess your skills. If the project requires running new wiring, modifying circuits, or working with unfamiliar electrical systems, hire a licensed electrician.
Maintenance / Upkeep Tips
Preserve your kitchen island lighting’s beauty and functionality with these maintenance practices:
Regular Cleaning Schedule:
Dust fixtures weekly with a microfiber cloth or duster to prevent buildup. Monthly, turn off power and wipe down fixtures with appropriate cleaner—glass cleaner for glass elements, damp cloth for metal finishes, and specialized cleaners for unique materials like copper or brass.
Bulb Replacement Strategy:
Replace LED bulbs when they burn out (typically after 15,000-25,000 hours). When replacing, purchase all bulbs from the same manufacturer and production batch to ensure consistent color temperature. Keep spare bulbs on hand for quick replacements.
Fixture Inspection:
Quarterly, check that all mounting hardware remains tight and secure. Vibrations from normal household activity can gradually loosen connections. Tighten any loose screws or connections immediately.
Electrical Connection Monitoring:
Annually, turn off power and carefully remove canopies to inspect wire connections. Look for signs of overheating (discolored wire insulation), corrosion, or loose wire nuts. Address any concerns immediately or consult an electrician.
Finish Protection:
For metal fixtures, apply appropriate polish or protectant according to manufacturer recommendations. Brass and copper fixtures may develop patina over time—decide whether you prefer the aged look or wish to maintain original brightness with regular polishing.
Dimmer and Switch Maintenance:
If you notice flickering, buzzing, or erratic dimmer behavior, the dimmer switch may need replacement. Ensure you’re using dimmers specifically rated for your bulb type (standard vs. LED-compatible).
Shade and Glass Care:
Remove and hand-wash glass shades every 3-4 months using warm water and mild dish soap. Avoid abrasive cleaners that can scratch surfaces. Dry thoroughly before reinstalling to prevent water spots.
Cord and Chain Inspection:
For fixtures with fabric cords or chains, inspect for fraying, discoloration, or wear. Replace damaged cords immediately as they pose safety hazards. Most manufacturers sell replacement components.
Seasonal Updates:
Consider switching decorative bulb styles seasonally—Edison-style vintage bulbs for cozy fall/winter ambiance, clear bright bulbs for spring/summer energy. This simple swap refreshes your space without major investment.
Conclusion
Selecting and installing the perfect Kitchen Island Lighting Fixtures represents one of the most impactful improvements you can make to your culinary space. As we’ve explored throughout this guide, the right lighting does far more than simply illuminate your work surface—it transforms your kitchen into a designer showcase that balances stunning aesthetics with enhanced functionality. From the initial planning stages through precise installation and ongoing maintenance, every step contributes to creating a kitchen environment where you’ll love spending time preparing meals, entertaining guests, and gathering with family.
The versatility of Kitchen island pendant lights means there’s a perfect solution for every design style, budget level, and spatial constraint. Whether you’ve chosen sleek modern pendants, rustic farmhouse fixtures, industrial cage lights, or elegant chandeliers, your new lighting will serve as both a practical tool and a stunning focal point for years to come. The investment in quality fixtures pays dividends through increased home value, reduced energy costs with LED technology, and the daily joy of working in a beautifully lit space.
Now that you’re equipped with comprehensive knowledge about selecting, installing, and maintaining kitchen island lighting, it’s time to transform your own space. Take measurements, explore your style preferences, and begin browsing fixtures that speak to your design sensibility. Your dream kitchen is just a lighting upgrade away—start your transformation today and experience the remarkable difference that thoughtfully chosen lighting makes in the heart of your home.
FAQs
Q1: How many pendant lights do I need for my kitchen island?
The number depends on your island length. For islands 4-5 feet long, two pendants work well. Islands 6-7 feet long typically look best with three pendants. For islands over 8 feet, consider four pendants or a long linear fixture. Space pendants 30-36 inches apart and maintain equal distance from island ends.
Q2: Can I install kitchen island lighting myself, or should I hire an electrician?
If you’re simply replacing existing fixtures in the same locations and feel comfortable working with basic electrical connections, DIY installation is feasible. However, if your project requires running new wiring, installing new junction boxes, or working with unfamiliar electrical systems, hiring a licensed electrician ensures safety and code compliance.
Q3: What’s the ideal height to hang pendant lights over a kitchen island?
The standard recommendation is 30-36 inches from the island countertop surface to the bottom of the pendant fixture. This height provides adequate task lighting without obstructing sight lines. For islands used primarily for seating and dining rather than food prep, you can hang fixtures slightly higher (36-40 inches).
Q4: How do I choose the right size pendant lights for my island?
Select pendants with diameter approximately one-quarter to one-third of your island width. For example, a 36-inch wide island looks best with 9-12 inch diameter pendants. Also consider visual weight—ornate or dark fixtures appear larger than minimalist or transparent designs, so adjust accordingly.
Q5: Should my kitchen island lighting match my dining room chandelier?
Exact matching isn’t necessary and can sometimes look too matchy-matchy. Instead, aim for complementary styles and coordinating finishes. Your fixtures should share common design elements (similar metal finish, comparable style era, or related shapes) while maintaining their individual character. This approach creates cohesive flow without appearing overly coordinated.