How to Choose the Right Bike Organizers for Your Garage
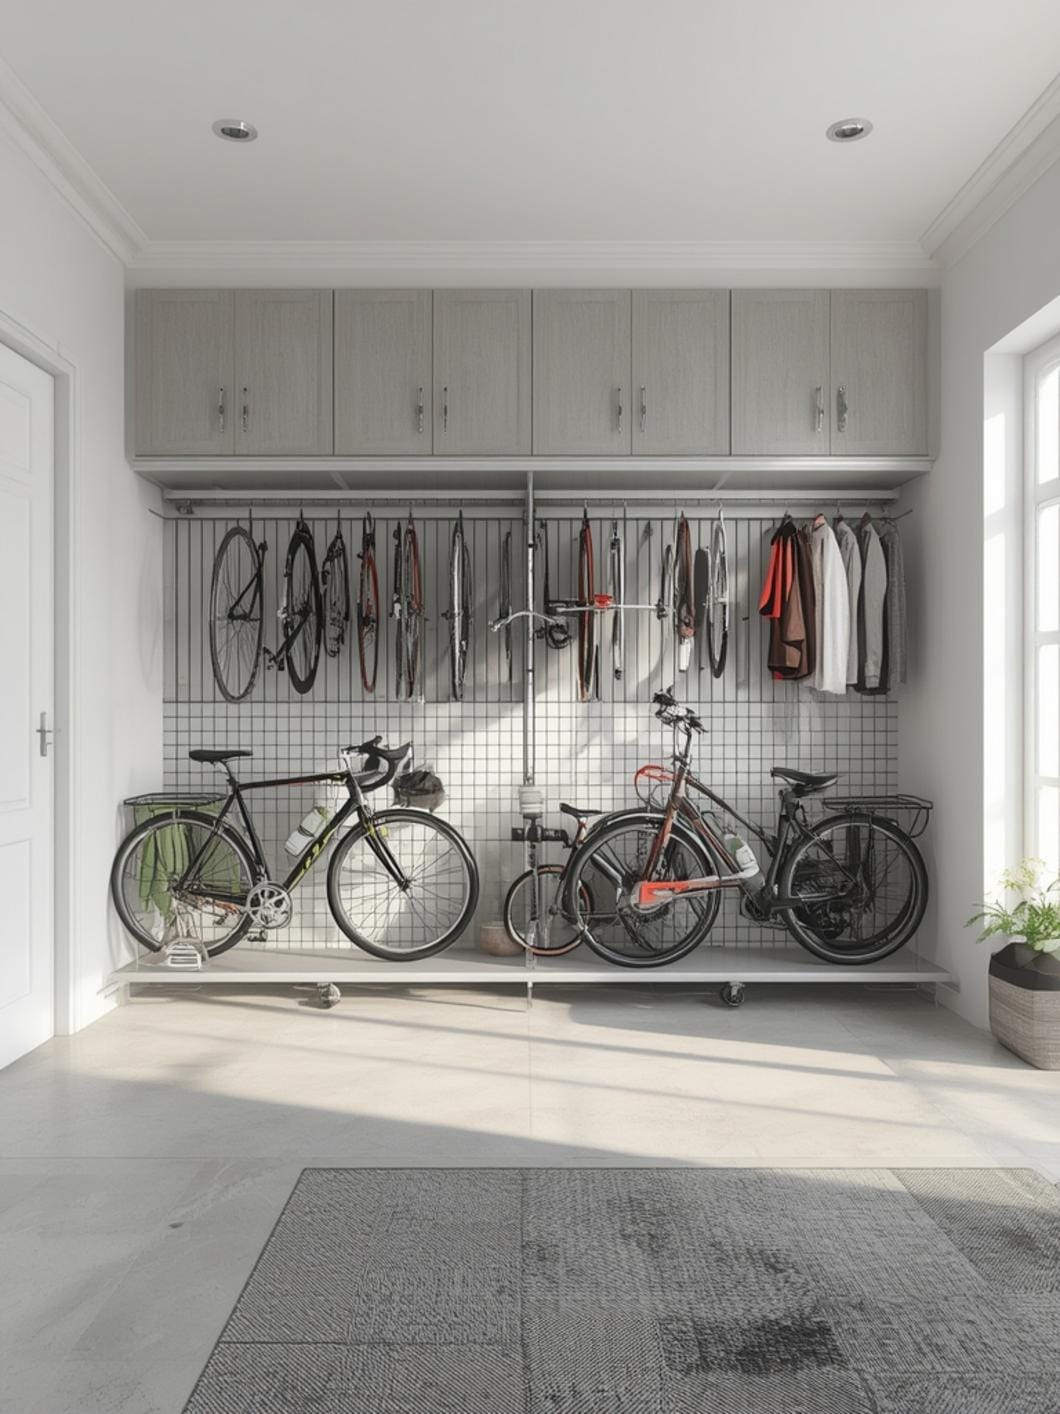
Your garage is packed, bikes are tangled, and every time you try to grab one, it feels like you’re playing Jenga with handlebars. You deserve better than this chaos. Creating a functional, organized garage starts with smart bike organizers for garage spaces that actually work for your daily routine.
Whether you have mountain bikes, kids’ bikes, or a mix of everything, the right storage setup makes all the difference. You’ll reclaim floor space, protect your bikes from damage, and finally have room to park your car where it belongs.
This guide will walk you through everything you need to know about choosing, installing, and maintaining bike storage that fits your home and your budget.
Table of Contents
Materials & Decor Elements
Before you start organizing, gather the right materials to create a system that lasts. You won’t need professional tools or complicated equipment—just the basics that any homeowner can handle.
Wall-Mounted Racks:
– Horizontal hooks for individual bikes
– Vertical racks that hold bikes by the front wheel
– Gravity stands that lean bikes against the wall
Ceiling Storage Options:
– Pulley systems with rope and hooks
– Overhead shelf racks
– Adjustable hoist systems
Freestanding Solutions:
– Floor stands that hold multiple bikes
– Leaning racks that require no installation
– Wheeled bike carts for easy repositioning
Hardware and Tools:
– Stud finder to locate solid mounting points
– Drill with appropriate drill bits
– Level to ensure straight installation
– Measuring tape for proper spacing
– Pencil for marking mounting holes
– Wall anchors if you can’t mount into studs
Protective Elements:
– Foam or rubber padding on hooks
– Bike covers for long-term storage
– Non-slip mats for freestanding racks
Choose materials based on your garage walls. Drywall needs anchors, while concrete requires masonry bits. Knowing your wall type before shopping saves time and frustration.
Timing / Project Planning
Plan your bike organization project during a mild-weather weekend when you can work comfortably with the garage door open. Spring and fall are ideal since you’ll want good ventilation and comfortable temperatures while you work.
Time Investment:
Most homeowners complete a basic bike organizer installation in 2–4 hours. This includes measuring, marking, drilling, and mounting. If you’re installing multiple racks or a ceiling system, budget a full afternoon.
Start in the morning so you have plenty of natural light. You’ll make better decisions about placement and avoid eyestrain while measuring and drilling.
Budget Planning:
Basic wall hooks start around $15–30 per bike. Mid-range systems with better padding and adjustability run $40–80. Premium pulley systems or heavy-duty racks cost $80–150 per bike.
Factor in hardware costs if your garage walls need special anchors. Budget an extra $10–20 for quality mounting supplies that won’t fail under weight.
Before You Begin:
Clear your garage enough to access the walls where you’ll mount racks. Move cars, boxes, and tools out of the way. This seems obvious, but working in a cluttered space leads to mistakes and frustration.
Measure your bikes first. You need to know handlebar width, wheel diameter, and overall height to space your racks correctly. Bikes that touch or overlap defeat the entire purpose of organizing.
Step-by-Step Instructions
Choose Your Wall Location:
Pick a wall section that’s accessible but doesn’t block garage doors, windows, or your workbench. You want easy access to grab bikes without navigating around other obstacles.
Stand in your garage and imagine your daily routine. Will you walk past these bikes carrying groceries? Does this spot block seasonal items you need to access? Think through the flow before drilling.
Measure and Mark Mounting Heights:
For horizontal wall hooks, mount them 5–6 feet high for adult bikes. This keeps bikes at a comfortable grabbing height while clearing floor space below. Kids’ bikes can go lower, around 4 feet, so children can reach them independently.
Vertical racks need 2–3 feet of clearance between bikes to prevent handlebar interference. Use your measuring tape to mark spots, then verify with your actual bikes before drilling.
Locate Wall Studs:
Run your stud finder across the wall at your marked heights. Mounting into studs provides the strongest hold for bikes that weigh 20–40 pounds each. Mark stud locations clearly with a pencil.
If studs don’t align with your ideal placement, heavy-duty wall anchors rated for 50+ pounds work in drywall. Never trust basic plastic anchors with bike weight—they’ll fail eventually.
Understanding How to Mount Wall Bike Racks in Garage Spaces:
Hold your rack against the wall at the marked spot and use a level to ensure it’s straight. Mark the mounting holes with a pencil, then set the rack aside. Drill pilot holes at your marks, using the bit size recommended on your hardware package.
For drywall with anchors, drill holes slightly smaller than your anchors, then gently tap anchors into place with a hammer. For studs, drill directly into wood. Line up your rack and drive screws firmly but don’t overtighten—stripped holes mean starting over in a new spot.
Test each rack before hanging bikes. Pull down firmly with both hands. It should feel rock-solid with zero movement.
Install Ceiling Systems (If Applicable):
Ceiling-mounted hoists require drilling into joists, which are the structural beams above your garage. Use your stud finder on the ceiling to locate joists, then mark and drill mounting holes.
Follow manufacturer instructions carefully for pulley systems. These typically involve mounting brackets, threading rope through pulleys, and attaching bike hooks. Test the pulley action with light weight before trusting it with your bike.
Set Up Freestanding Options:
If drilling isn’t an option (rental homes, brick walls, or personal preference), quality freestanding racks work beautifully. Position them against the wall for stability and place rubber mats underneath to protect your garage floor and prevent sliding.
Weight the base if your rack feels tippy. Some homeowners add sandbags or store heavy items on lower shelves to improve stability.
Create a Bike Storage Zone:
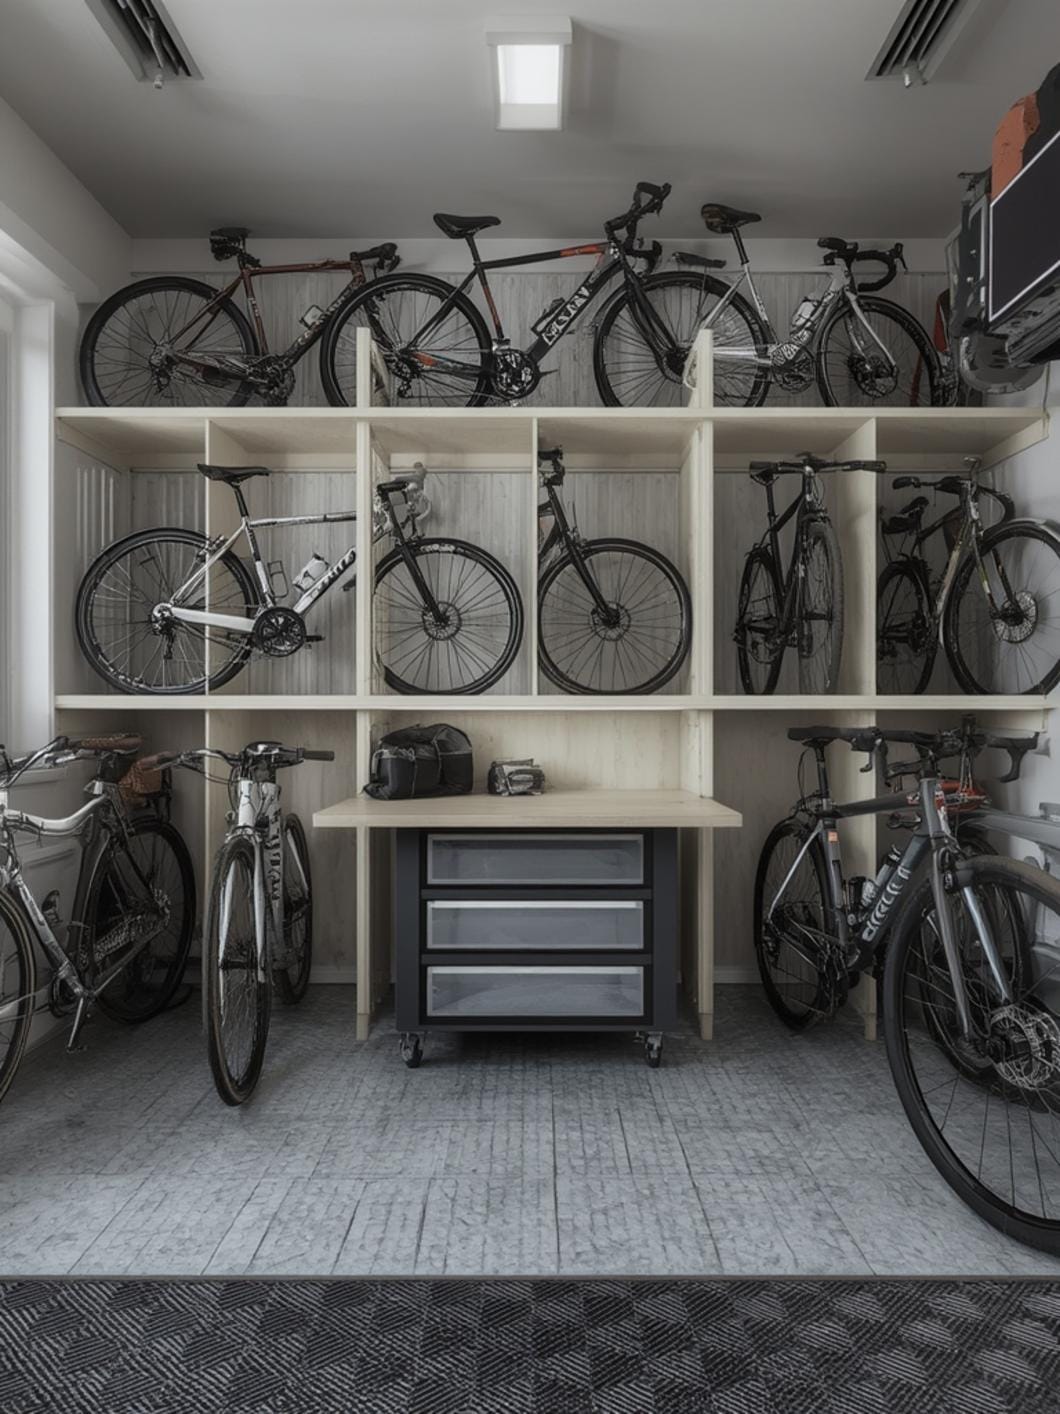
Arrange your bikes by frequency of use. Daily riders go in the most accessible spots. Kids’ bikes should be low and easy to reach. Seasonal bikes (like that mountain bike you use for summer trails) can go higher or toward the back.
Benefits / Advantages
Organized bike storage transforms your garage from chaotic dumping ground to functional space. You’ll notice the difference every single day when you can actually find and grab what you need.
Reclaimed Floor Space:
Getting bikes off the floor opens up serious square footage. You might finally park inside during winter storms instead of scraping ice off your windshield every morning. Or you’ll create room for that workbench project you’ve been planning.
Protected Investment:
Bikes left leaning against walls get scratched, dented, and damaged over time. Proper storage protects your investment, keeping bikes in better condition for resale or years of reliable use.
Family Harmony:
No more arguments about who knocked whose bike over or why no one can find their helmet. When everything has a designated spot, family members (yes, even teenagers) can actually put things away correctly.
Safety First:
Bikes scattered on the garage floor create tripping hazards, especially in dim lighting. Wall or ceiling storage eliminates this danger completely, making your garage safer for everyone who walks through it.
Visual Appeal:
An organized garage simply looks better. You’ll feel proud instead of embarrassed when guests see your space or when you pull in after work each day.
Tips, Alternatives, Styling Advice
Budget-Friendly Approach ($30–60):
Individual wall hooks offer the most affordable solution. Buy quality hooks with rubber coating to protect bike frames, and install them yourself in a weekend afternoon. This works perfectly for 1–3 bikes.
Space hooks 2–3 feet apart vertically for a staggered, space-efficient arrangement. This prevents handlebar collision while maximizing wall space.
Mid-Range Option ($80–150):
Adjustable rack systems that hold multiple bikes at different heights provide excellent value. These systems grow with your needs—start with two bikes and add more hooks as your family expands or bike collection grows.
Look for racks with integrated shelves for helmets and accessories. The convenience of having everything in one zone is worth the modest price increase.
Premium Solution ($150–300):
Motorized ceiling hoists or heavy-duty rail systems represent the top tier of bike storage. You’ll get maximum floor space back and impressive weight capacity for multiple heavy bikes.
These systems work especially well in garages with high ceilings where vertical space goes unused. The investment pays off in functionality and home value.
Small Garage Adaptation:
Vertical racks that hang bikes by the front wheel save the most space in tight garages. Bikes hang flat against the wall, taking up less than 6 inches of depth.
Corner installations maximize awkward spaces that don’t work for other storage. Two walls meet at corners, allowing you to fit bikes without blocking main garage pathways.
Rental-Friendly Alternative:
Freestanding racks require zero wall damage, making them perfect for renters. Choose models with weighted bases that won’t tip when loaded. When you move, your bike storage moves with you.
Tension-mounted poles that fit between floor and ceiling offer another no-drill option. These work best in garages with 8–10 foot ceiling heights and provide surprising stability.
Common Mistakes to Avoid
Mounting Too High:
Installing racks above comfortable reaching height means you’ll struggle to hang and retrieve bikes daily. Mount at shoulder to head height for easy access without a step stool.
Ignoring Weight Limits:
Cheap hooks rated for 25 pounds will fail under a 35-pound mountain bike. Always verify weight capacity and choose hardware rated above your heaviest bike’s weight with safety margin to spare.
Insufficient Spacing:
Bikes mounted too close together lead to tangled handlebars and scratched frames. Measure your widest handlebars and add 6 inches of clearance between mounting points.
Skipping the Level:
Crooked bike racks look terrible and function poorly—bikes may slide off unevenly mounted hooks. Spend 30 seconds with a level during installation to get it right the first time.
Forgetting About Helmets and Accessories:
You organized the bikes but left helmets, pumps, and locks scattered everywhere. Add hooks or shelves near your bike storage for a complete organization system that actually stays organized.
Mounting to Drywall Without Proper Anchors:
Standard drywall anchors fail under bike weight, leading to damaged walls and fallen bikes. Use heavy-duty anchors rated for 50+ pounds or find studs for direct mounting.
Maintenance / Upkeep Tips
Check mounting hardware every 3–4 months, especially after heavy use or temperature changes. Garage temperature swings can loosen screws over time. Tighten any loose bolts before they become problems.
Clean hooks and racks twice a year to remove dirt, grease, and grime that transfers from bikes. Simple soap and water works perfectly. This prevents buildup that can scratch frames or damage finishes.
Inspect padding on hooks annually and replace worn sections. Deteriorated padding exposes metal that scratches your bike frames. Replacement foam or rubber costs just a few dollars at hardware stores.
For ceiling hoists, lubricate pulley systems yearly with silicone spray. This prevents squeaking and ensures smooth operation. Test rope condition at the same time, replacing any frayed sections immediately.
Adjust rack positions as your family’s needs change. Kids grow, new bikes arrive, old bikes get donated. Your storage system should evolve rather than staying stuck in an outdated configuration.
Keep the floor area beneath bike storage clear of boxes and clutter. This makes accessing bikes easier and helps you spot any mounting hardware issues before they cause failures.
Conclusion
Creating an organized bike storage system in your garage doesn’t require contractor skills or a massive budget. With the right planning and basic tools, you’ll transform chaos into functional space that serves your family every day.
The key is choosing bike organizers that match your wall type, family size, and daily routine. Whether you install wall hooks, ceiling hoists, or freestanding racks, you’re investing in safety, convenience, and a garage you’ll actually enjoy using.
Ready to tackle more garage organization challenges? Explore DecorKingdom for dozens more practical guides that help you create the functional, beautiful home you deserve.
FAQs
How much weight can garage wall bike hooks typically hold?
Quality wall-mounted bike hooks hold 35–50 pounds when properly installed into studs. Heavy-duty models rated for 65+ pounds work for electric bikes and cargo bikes. Always verify the specific weight rating on your chosen product and mount into studs rather than drywall alone for maximum safety.
Can I install bike racks on garage drywall without hitting studs?
Yes, but only with heavy-duty wall anchors rated for 50+ pounds. Toggle bolts or metal anchors designed for hollow walls distribute weight effectively across drywall. Never use standard plastic anchors for bike storage—they’ll fail under the weight and damage your wall.
What’s the best bike storage option for a single-car garage?
Vertical wall racks that hang bikes by the front wheel save the most space in tight garages. These take up less than 6 inches of depth while keeping bikes accessible. Ceiling hoists work well too if you have 9+ foot ceilings and don’t need daily access.
How far apart should I space wall-mounted bike hooks?
Space horizontal hooks 16–24 inches apart horizontally for side-by-side storage. For vertical staggered arrangements, allow 2–3 feet between bikes to prevent handlebar interference. Measure your widest handlebars and add 6 inches of clearance for comfortable storage and retrieval.
Do I need special tools to install garage bike organizers?
Most installations require just a drill, drill bits, stud finder, level, and measuring tape—basic tools most homeowners already own. For concrete garage walls, add a masonry bit. The entire process takes 2–4 hours and doesn’t require any specialized contractor equipment or electrical work.
—
Meta Title: Bike Organizers for Garage: Smart Storage Ideas 2026
Meta Description: Transform garage chaos with bike organizers for garage spaces. Get practical storage solutions that reclaim floor space and protect your bikes.