best 7 kitchen light fixtures for your home
Walking into a well-lit kitchen can transform your entire cooking and dining experience. Whether you’re preparing a family meal, entertaining guests, or simply enjoying your morning coffee, the right Kitchen Light Fixtures can make all the difference in creating a warm, functional, and stylish space.
Table of Contents
Lighting isn’t just about visibility—it’s about setting the mood, highlighting your beautiful countertops, and making your kitchen the heart of your home. If you’re considering upgrading your kitchen lighting, you’re in the right place. This comprehensive guide will walk you through everything you need to know about selecting and installing Pendant Kitchen Lights and other fixtures that will elevate your kitchen’s aesthetic while improving its functionality. From understanding different lighting types to step-by-step installation, we’ll cover it all.
Materials & Decor Elements
Before you begin your kitchen lighting transformation, gather these essential materials and decor elements:
Lighting Fixtures:
– Main ceiling light fixture (flush mount or semi-flush mount)
– Pendant lights (2-3 for kitchen islands)
– Under-cabinet LED strip lights
– Recessed lighting cans (4-6 depending on kitchen size)
Tools Required:
– Wire strippers
– Voltage tester
– Screwdriver set (flathead and Phillips)
– Drill with various bits
– Ladder or step stool
– Wire nuts and electrical tape
– Junction box (if not already installed)
– Stud finder
Decor Enhancement Items:
– Dimmer switches for adjustable ambiance
– Light bulbs (LED recommended for energy efficiency)
– Decorative covers for outlets and switches
– Cable management clips for pendant lights
Safety Equipment:
– Safety glasses
– Work gloves
– Circuit breaker labels
Timing / Project Planning
Proper planning ensures your kitchen lighting project goes smoothly without disrupting your daily routine.
Preparation Phase (1-2 days):
– Research and purchase lighting fixtures that match your kitchen style
– Measure your space and determine optimal fixture placement
– Review electrical requirements and local building codes
– Turn off power at the circuit breaker and test all connections
– Clear the work area and protect countertops and flooring
Installation Timeline:
– Single pendant light or ceiling fixture: 1-2 hours
– Multiple pendant lights over an island: 2-4 hours
– Complete kitchen lighting overhaul (including recessed and under-cabinet lights): 6-8 hours
– Professional installation may take less time but adds to overall project duration
Best Time to Install:
Consider scheduling your installation during daylight hours when you have maximum natural light. Weekend mornings work best for most homeowners, allowing you to complete the project without rushing for work commitments.
Step-by-Step Instructions

Follow these detailed instructions to successfully install your new
and create the perfect lighting scheme.
Step 1: Plan Your Lighting Layout
Begin by mapping out your kitchen’s three essential lighting layers: ambient (general overhead lighting), task (focused work area lighting), and accent (decorative or highlighting fixtures). Identify where you’ll place each fixture type for optimal coverage.
Step 2: Turn Off Power and Test
Switch off the circuit breaker controlling your kitchen lights. Use a voltage tester to confirm power is completely off before touching any wires. This critical safety step cannot be skipped.
Step 3: Remove Old Fixtures
Carefully unscrew and remove existing light fixtures. Support the fixture with one hand while disconnecting wires. Note how existing wires are connected—take a photo if helpful.
Step 4: Install Junction Boxes (If Needed)
For Pendant Kitchen Lights over an island where no electrical box exists, you’ll need to install junction boxes. Mark ceiling locations, cut openings with a drywall saw, run electrical cable from the nearest power source, and secure junction boxes to ceiling joists.
Step 5: Connect Wiring
Match wire colors: black to black (hot), white to white (neutral), and green or bare copper to ground. Twist wires together clockwise, secure with wire nuts, and wrap with electrical tape for extra security.
Step 6: Mount the Fixture
Follow manufacturer instructions to attach mounting brackets. For pendant lights, adjust cable or chain length before securing. Ensure fixtures are level and properly supported.
Step 7: Install Bulbs and Test
Install appropriate bulbs for your fixtures. Restore power at the circuit breaker and test each light. Check that dimmer switches (if installed) function properly across the full range.
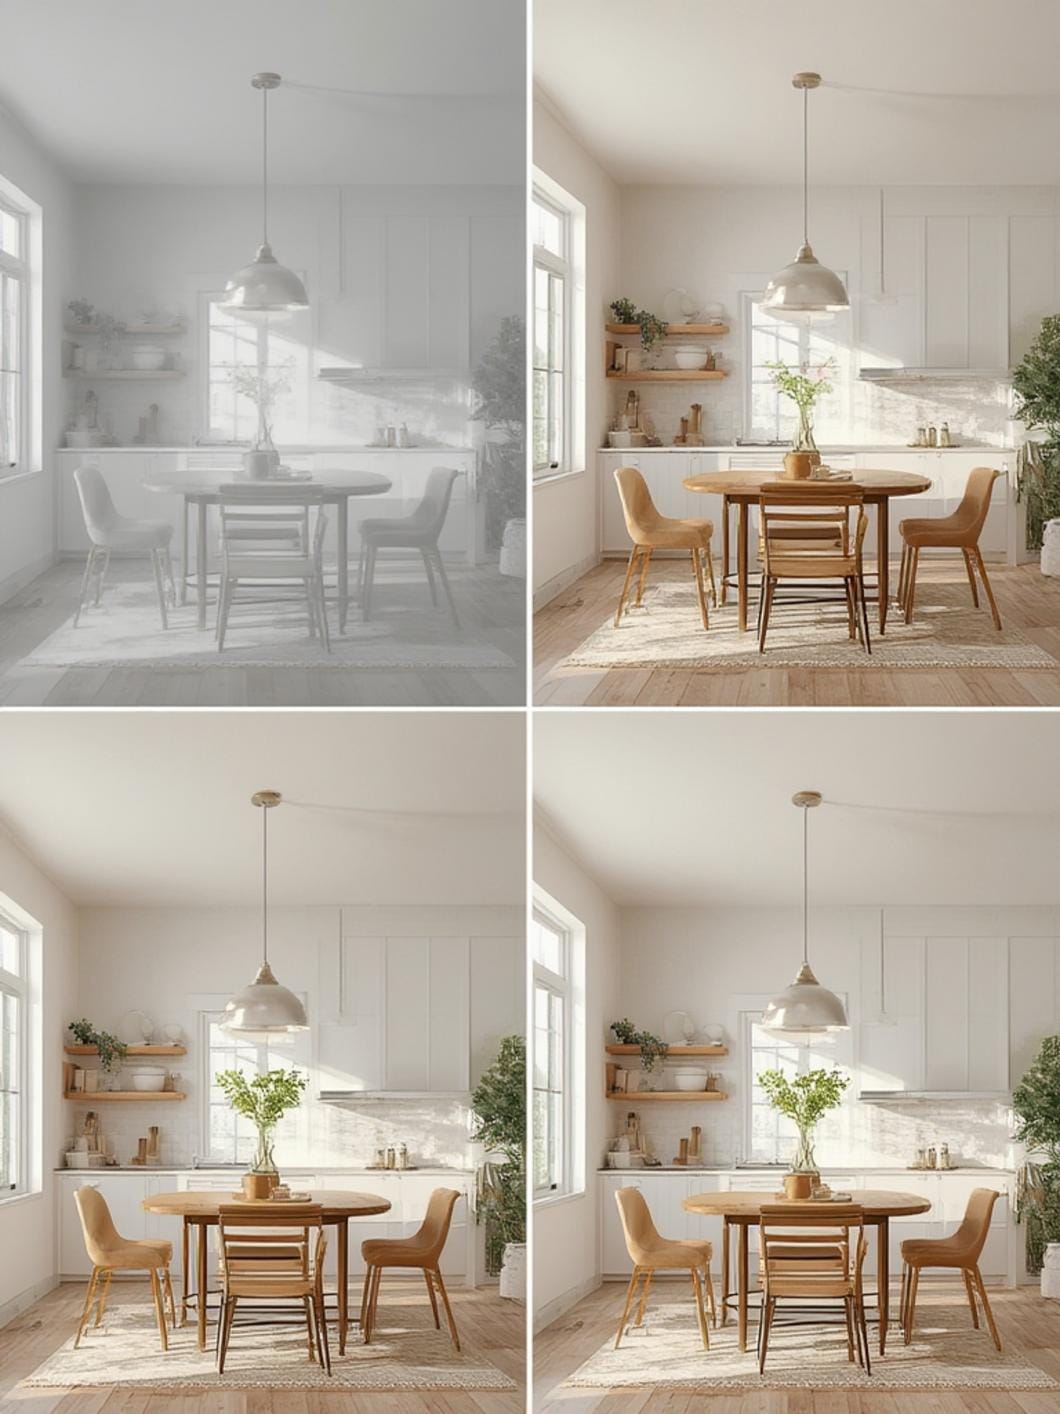
Step 8: Add Under-Cabinet Lighting
Measure cabinet undersides and cut LED strip lights to size. Clean surfaces, peel adhesive backing, and press strips firmly into place. Connect to power source and test before permanent installation.
Step 9: Install Recessed Lighting
Mark recessed light locations, cut openings, run wiring through ceiling, attach fixtures to ceiling joists, connect wiring, and secure trim rings.
Step 10: Final Adjustments
Step back and evaluate your lighting. Adjust pendant heights if needed, reposition adjustable recessed lights to eliminate shadows, and ensure all switches and dimmers work correctly.
Benefits / Advantages
Upgrading your kitchen lighting offers numerous aesthetic and functional advantages that enhance your daily life:
Enhanced Visibility and Safety:
Proper lighting eliminates dangerous shadows while chopping vegetables or working with hot cookware. Under-cabinet lights illuminate countertops perfectly for food preparation, reducing eye strain and accident risks.
Increased Home Value:
Quality lighting fixtures serve as an attractive selling point for potential buyers. A well-lit kitchen is consistently ranked among the top features homebuyers seek, potentially increasing your property value by 3-5%.
Energy Efficiency:
Modern LED fixtures consume up to 75% less energy than traditional incandescent bulbs while lasting 25 times longer. This translates to significant savings on electricity bills and reduced environmental impact.
Improved Aesthetics:
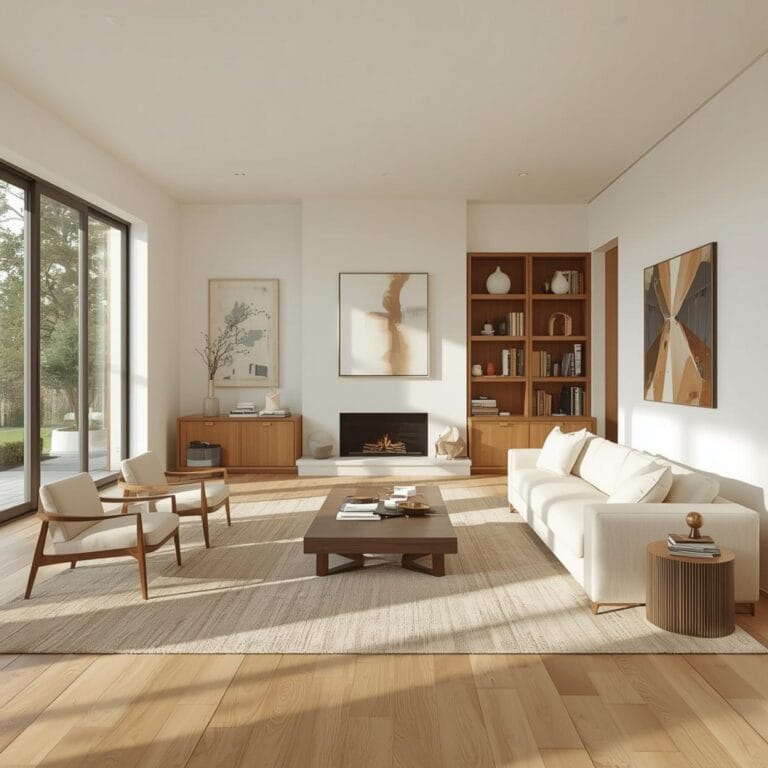
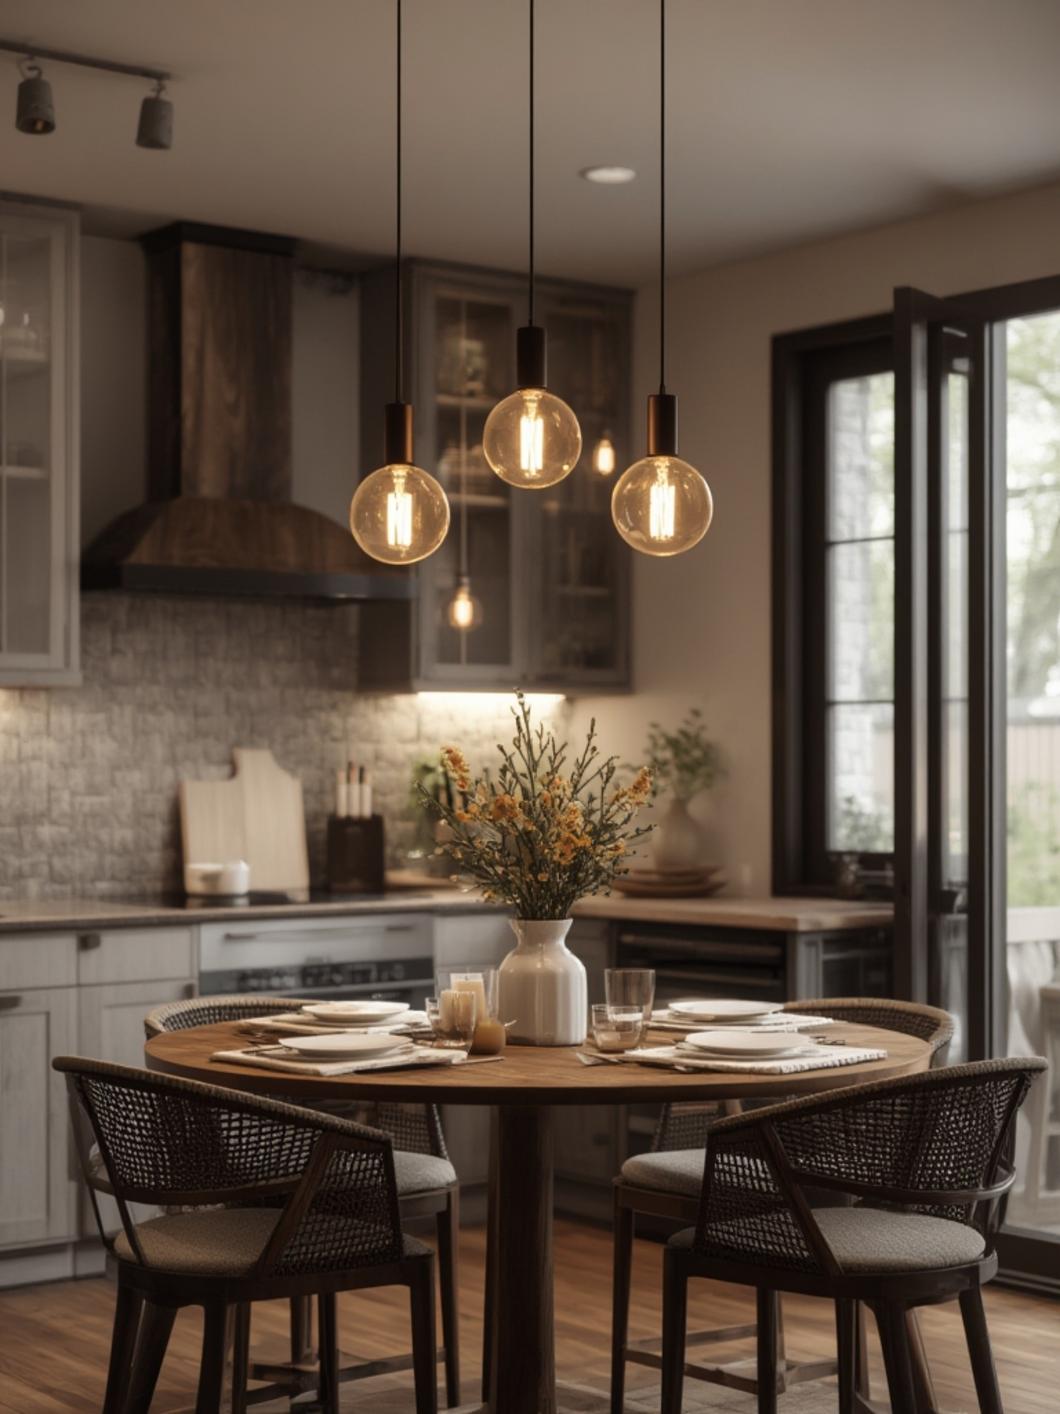
Strategic lighting highlights architectural features, beautiful backsplashes, and decorative elements. Pendant lights over islands create focal points that define spaces and add personality to your kitchen design.
Versatile Ambiance:
Dimmer switches allow you to adjust lighting for different activities—bright for cooking, softer for dining, and ambient for entertaining guests. This flexibility makes your kitchen adaptable to any occasion.
Better Color Rendering:
Quality fixtures with high Color Rendering Index (CRI) ratings display food colors accurately, making meals look more appetizing and helping you select properly ripened produce.
Tips, Alternatives, Styling Advice
Budget-Friendly Alternatives:
– Replace just the most visible fixtures (pendants over island) for immediate impact without complete renovation costs
– Choose plug-in under-cabinet lights instead of hardwired versions to save installation expenses
– Shop during holiday sales or clearance events for designer fixtures at reduced prices
– Consider brushed nickel or matte black finishes, which look expensive but cost less than polished metals
Small Kitchen Solutions:
– Use multi-function fixtures that provide both ambient and task lighting
– Install slim-profile flush-mount ceiling fixtures to avoid overwhelming limited space
– Choose clear or white glass pendant shades that don’t visually clutter compact areas
– Maximize under-cabinet lighting to expand usable counter space without adding ceiling fixtures
Styling Recommendations:
– Match metal finishes across all fixtures and hardware (faucets, cabinet pulls) for cohesive design
– Choose pendant sizes proportional to your island—typically 12-16 inches in diameter for standard islands
– Space multiple pendants 24-30 inches apart for balanced visual appeal
– Layer lighting at different heights to create depth and interest
Design Style Variations:
– Modern/Contemporary: Geometric shapes, sleek lines, chrome or brushed nickel finishes
– Farmhouse: Edison bulbs, mason jar pendants, weathered wood accents, black iron fixtures
– Industrial: Exposed bulbs, metal cages, warehouse-style pendants, concrete or steel elements
– Traditional: Ornate details, brass or bronze finishes, crystal accents, classic chandelier styles
Color Temperature Guide:
– 2700K-3000K (warm white): Creates cozy, inviting atmosphere for dining areas
– 3500K-4100K (neutral white): Balanced light suitable for general kitchen tasks
– 5000K-6500K (daylight): Bright, energizing light ideal for detailed food preparation
Common Mistakes to Avoid
Mistake 1: Insufficient Lighting Coverage
Many homeowners install too few fixtures, leaving dark corners and shadows. Solution: Calculate required lumens based on kitchen size (70-80 lumens per square foot for kitchens) and distribute fixtures evenly throughout the space.
Mistake 2: Incorrect Pendant Height
Hanging pendants too low causes head bumps; too high reduces their effectiveness and visual impact. Solution: Hang pendants 30-36 inches above countertops and islands, adjusting slightly based on ceiling height and personal preference.
Mistake 3: Ignoring Task Lighting Needs
Relying solely on overhead ambient lighting creates shadows where you work most. Solution: Always include under-cabinet lights above primary food preparation areas and consider adjustable track lighting for stovetop areas.
Mistake 4: Mismatched Color Temperatures
Mixing warm and cool light bulbs creates an uncomfortable, disjointed appearance. Solution: Select the same color temperature (Kelvin rating) for all bulbs throughout your kitchen, or intentionally separate zones with consistent temperatures within each zone.
Mistake 5: Skipping Dimmer Switches
Installing non-dimmable lights limits flexibility for different activities and times of day. Solution: Invest in compatible dimmer switches and dimmable LED bulbs for at least your main ambient lighting circuits.
Mistake 6: Overlooking Fixture Proportions
Oversized fixtures overwhelm small kitchens while tiny fixtures disappear in large spaces. Solution: Measure your island or table length and choose pendants that total one-half to two-thirds that length when combined.
Mistake 7: Poor Electrical Planning
Attempting electrical work beyond your skill level risks fire hazards and code violations. Solution: Hire a licensed electrician for complex installations involving new circuits, junction boxes, or when you’re uncertain about any aspect of the work.
Mistake 8: Neglecting Existing Decor
Installing fixtures that clash with your kitchen’s style creates visual discord. Solution: Choose lighting that complements your cabinetry, countertops, and overall design aesthetic rather than following trends that don’t suit your space.
Maintenance / Upkeep Tips
Proper maintenance keeps your kitchen lighting looking beautiful and functioning optimally for years.
Regular Cleaning Schedule:
– Dust fixtures weekly using a microfiber cloth or duster to prevent buildup
– Deep clean glass or metal shades monthly with appropriate cleaners
– Wipe pendant lights after cooking to remove grease splatter immediately
– Clean under-cabinet lights quarterly, as they accumulate dust quickly
Cleaning Methods by Material:
– Glass fixtures: Use glass cleaner or vinegar-water solution with soft cloth
– Metal finishes: Apply appropriate metal cleaner; avoid abrasives that scratch surfaces
– Crystal or decorative elements: Hand-wash with mild dish soap and warm water
– Fabric shades: Vacuum gently or spot-clean according to manufacturer instructions
Bulb Replacement:
Replace LED bulbs when they dim noticeably or fail completely (typically after 15,000-25,000 hours). Keep spare bulbs matching your chosen color temperature on hand for quick replacements.
Electrical Maintenance:
– Test dimmer switches annually to ensure smooth operation
– Tighten any loose mounting screws or brackets during cleaning
– Watch for flickering lights, which may indicate wiring issues requiring professional attention
– Inspect cords and connections on plug-in fixtures for wear or damage
Seasonal Updates:
Consider changing removable decorative elements seasonally without replacing entire fixtures. Swap pendant shades, add holiday-themed bulbs, or incorporate temporary decorative chains for fresh looks throughout the year.
Professional Inspections:
Schedule electrical inspections every 3-5 years, especially in older homes. Professional electricians can identify potential issues before they become safety hazards.
Conclusion
Transforming your kitchen with the right Kitchen Light Fixtures is one of the most impactful improvements you can make to your home. From increasing functionality and safety to creating a welcoming atmosphere that draws family and friends together, proper lighting touches every aspect of your kitchen experience. Throughout this guide, we’ve explored how to plan, select, and install various lighting types, including stylish that serve as both functional illumination and striking design elements. By following the step-by-step instructions, avoiding common mistakes, and implementing proper maintenance practices, you’ll enjoy a beautifully lit kitchen for years to come.
Remember that lighting is both an art and a science—balancing aesthetic appeal with practical needs creates the perfect kitchen environment. Whether you’re undertaking a complete lighting renovation or simply updating a few key fixtures, the investment in quality lighting pays dividends in daily comfort, improved functionality, and enhanced home value.
Ready to brighten your kitchen? Start planning your lighting project today by measuring your space, identifying your style preferences, and gathering the materials you’ll need. Don’t hesitate to consult with lighting professionals or electricians when needed—their expertise ensures safe, code-compliant installations that protect your home and family. Your dream kitchen is just a few light fixtures away!
FAQs
Q1: How many pendant lights should I install over my kitchen island?
The number depends on island length. For islands 4-5 feet long, install 2 pendants spaced 24-30 inches apart. Islands 6-7 feet long accommodate 3 pendants with similar spacing. Measure your island and choose pendant sizes proportional to the space—larger islands can support bigger fixtures.
Q2: Can I install kitchen light fixtures myself, or should I hire an electrician?
Simple fixture replacements (swapping one light for another using existing wiring) are DIY-friendly for those comfortable with basic electrical work. However, projects requiring new wiring, junction boxes, circuit additions, or anything involving your electrical panel should be handled by licensed electricians to ensure safety and code compliance.
Q3: What’s the best color temperature for kitchen lighting?
Most kitchens benefit from 3000K-4000K (warm to neutral white), which provides clarity for food preparation while maintaining a welcoming atmosphere. Task lighting can be slightly cooler (4000K-4500K) for detailed work, while dining areas may use warmer temperatures (2700K-3000K) for ambiance.
Q4: How do I choose the right size pendant lights for my kitchen?
Measure your island or table length and width. For islands, pendant diameter should be 8-12 inches for small islands, 12-16 inches for medium islands, and 16-22 inches for large islands. The combined width of all pendants should equal approximately one-half to two-thirds of the island length. Allow at least 6 inches clearance from island edges.
Q5: Are LED bulbs really worth the higher upfront cost?
Absolutely. LED bulbs use 75% less energy than incandescent bulbs and last up to 25 times longer, saving substantial money over their lifetime. They generate minimal heat, reducing cooling costs in summer. Quality LEDs also provide superior light quality with high CRI ratings, making colors appear more vibrant and true-to-life in your kitchen.