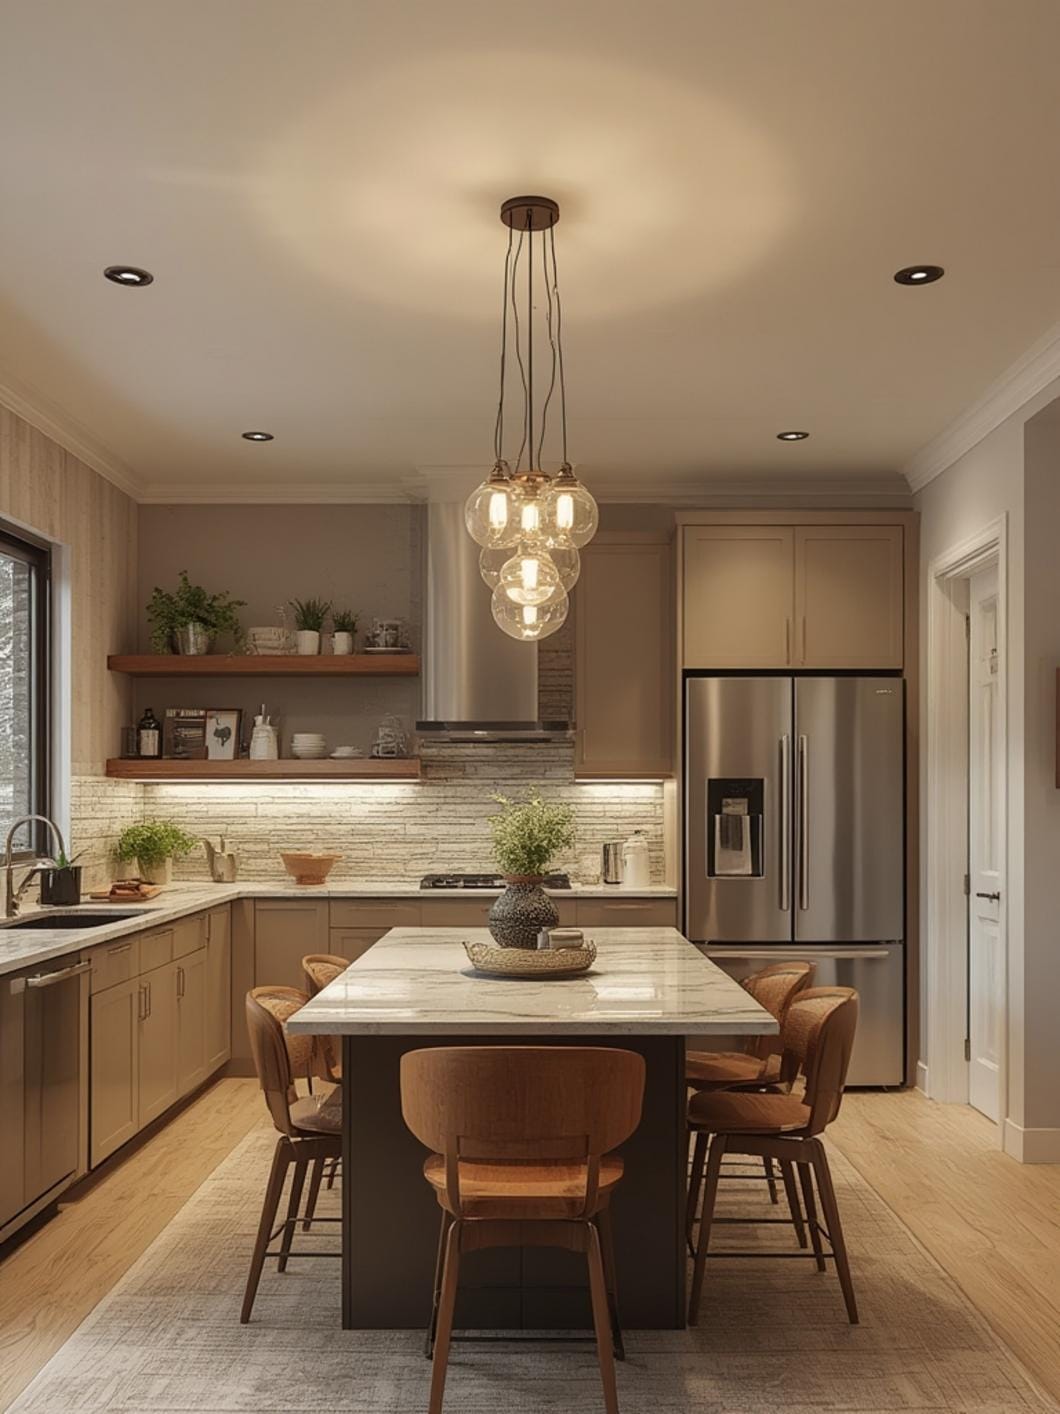
best 7 kitchen ceiling light fixtures for modern spaces
The kitchen is often called the heart of the home, where families gather, meals are prepared, and memories are made. Yet, many homeowners overlook one of the most critical elements that can dramatically transform this essential space: proper lighting. If you’re looking to elevate both the functionality and aesthetic appeal of your cooking area, investing in the right Kitchen Ceiling Light Fixtures is a game-changer.
Table of Contents
Within the first few steps of any kitchen renovation or refresh, choosing appropriate kitchen ceiling lights should be at the top of your priority list. The right lighting doesn’t just illuminate your workspace—it sets the mood, enhances safety, creates ambiance, and can even make your kitchen appear larger and more inviting. Whether you’re a culinary enthusiast who needs bright task lighting or someone who loves to entertain and desires adjustable ambient lighting, this comprehensive guide will walk you through everything you need to know about selecting, installing, and maintaining the perfect ceiling light fixtures for your kitchen.
Materials & Decor Elements
Before beginning your kitchen lighting transformation, gathering the right materials and tools will ensure a smooth installation process and optimal results. Here’s what you’ll need:
Lighting Fixtures:
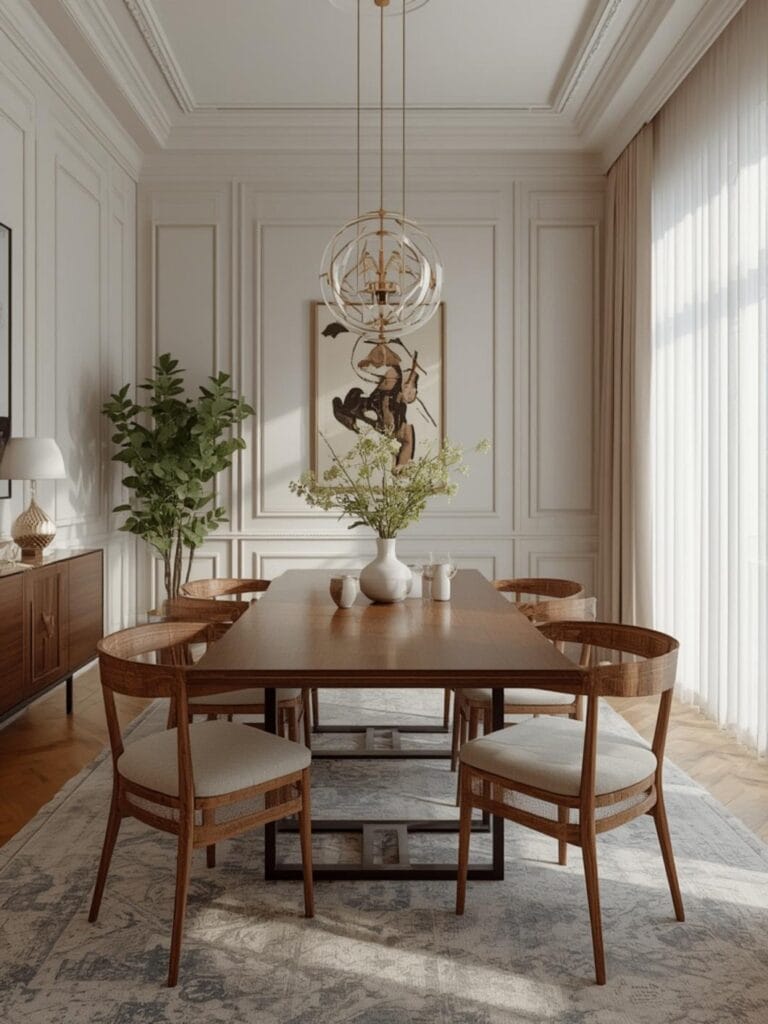
– Ceiling-mounted light fixtures (flush mount, semi-flush mount, or pendant lights)
– LED bulbs or compatible bulb types (check fixture specifications)
– Dimmer switches (optional but recommended)
– Track lighting systems (for modern or industrial styles)
– Recessed lighting cans (for a sleek, minimalist look)
Installation Tools:
– Screwdriver set (Phillips and flathead)
– Wire strippers
– Voltage tester
– Ladder or step stool
– Drill with appropriate bits
– Wire nuts and electrical tape
– Junction box (if not already installed)
Decor Enhancement Items:
– Light fixture finishes that match your kitchen hardware (brushed nickel, matte black, bronze, brass)
– Decorative covers or shades
– Smart home integration devices (smart bulbs or switches)
– Light diffusers for even illumination
Safety Equipment:
– Work gloves
– Safety glasses
– Circuit breaker labels
Timing / Project Planning
Proper planning is essential for a successful lighting installation project. Understanding the timeline will help you schedule accordingly and avoid disruptions to your daily routine.
Preparation Phase (1-2 days):
– Research and select your preferred light fixtures (2-4 hours)
– Measure ceiling dimensions and note existing electrical boxes (1 hour)
– Purchase all necessary materials and fixtures (2-3 hours)
– Review installation instructions and watch tutorial videos (1 hour)
– Turn off electricity at the circuit breaker and prepare workspace (30 minutes)
Installation Phase (2-6 hours):
The actual installation time varies depending on your experience level and the complexity of the fixtures:
– Simple flush-mount fixture replacement: 1-2 hours
– Installing multiple recessed lights: 4-6 hours
– Installing pendant lights or track lighting: 2-4 hours
– Adding dimmer switches: additional 1-2 hours per switch
Best Time to Complete This Project:
– Daytime hours when natural light provides visibility
– Weekends when you have uninterrupted time
– During mild weather if additional ventilation is needed
– Before or after major kitchen renovations to avoid interference
Professional vs. DIY Considerations:
While many homeowners can handle basic fixture replacements, consider hiring a licensed electrician if you’re adding new electrical circuits, relocating junction boxes, or if you’re uncomfortable working with electrical wiring. Professional installation typically takes 2-4 hours and ensures code compliance.
Step-by-Step Instructions
Follow these detailed steps to successfully install your new Kitchen Ceiling Light Fixtures and create a beautifully illuminated space:
Step 1: Safety First – Power Down
Turn off the electricity to your kitchen at the main circuit breaker panel. Use a voltage tester to confirm that no current is flowing to the ceiling fixture location. Place a note on the breaker box to prevent anyone from accidentally restoring power while you work.
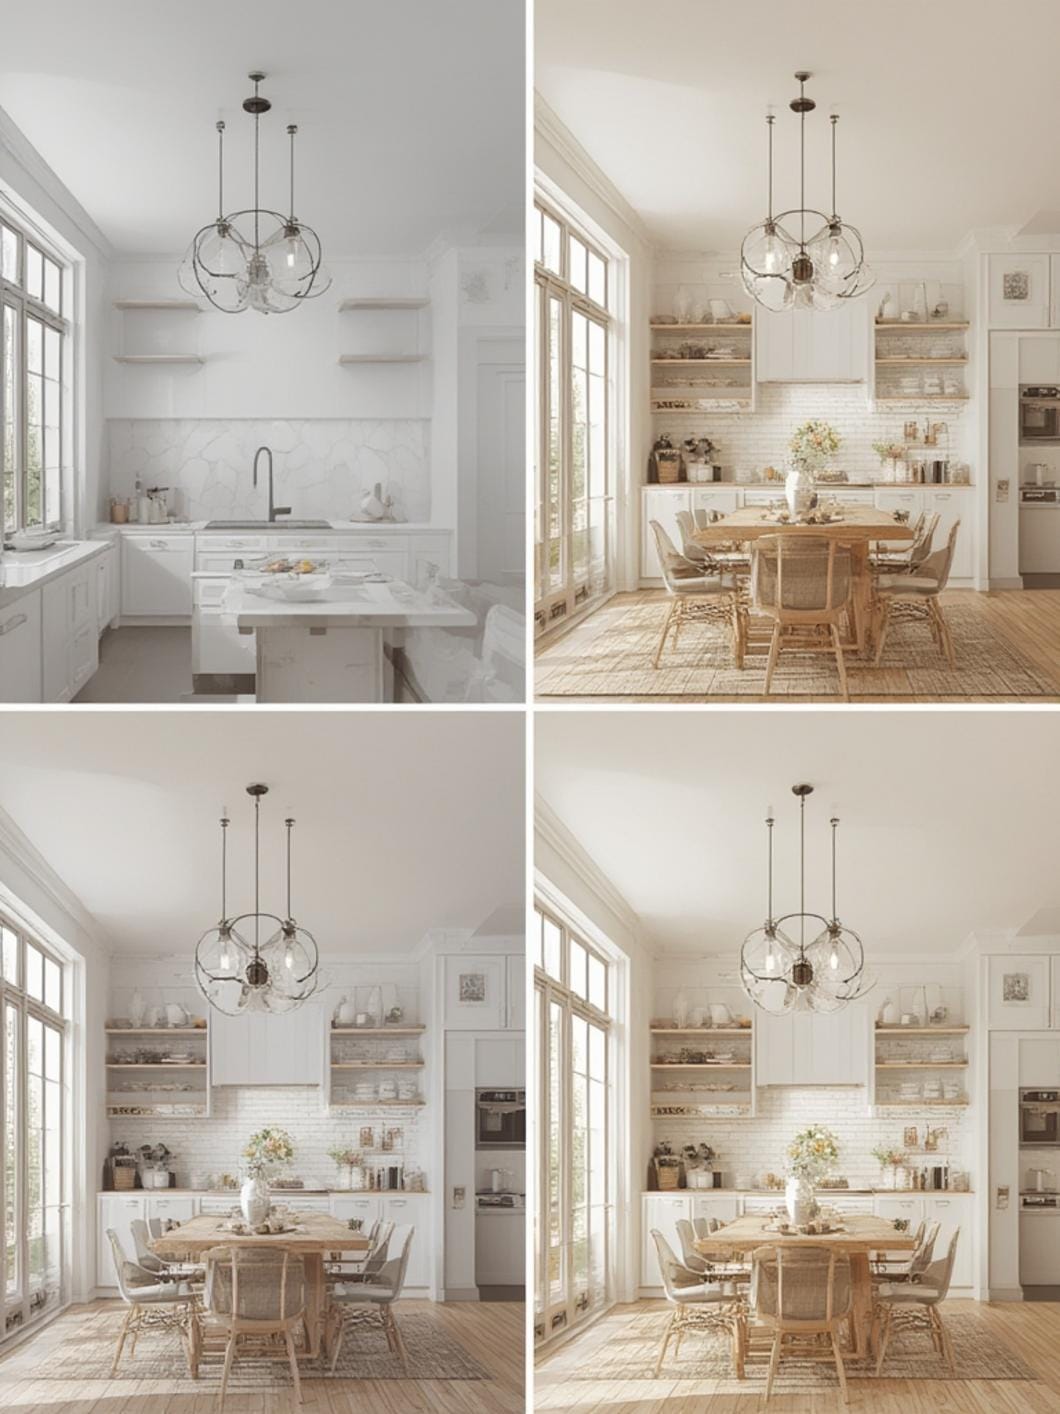
Step 2: Remove Existing Fixtures
Carefully remove the old light fixture by unscrewing the mounting hardware. Support the fixture with one hand while disconnecting the wire connections. Lower the old fixture and set it aside. Inspect the junction box for damage or corrosion.
Step 3: Prepare the Junction Box
Ensure the electrical junction box is securely fastened to a ceiling joist or blocking. If it’s loose or damaged, now is the time to reinforce or replace it. A properly secured box is essential for safety and to support the weight of your new kitchen ceiling lights.
Step 4: Connect the Wiring
Match the wires from your new fixture to the house wiring: white (neutral) to white, black (hot) to black, and green or bare copper (ground) to the ground wire or box. Use wire nuts to secure connections and wrap them with electrical tape for additional protection. Carefully tuck the connected wires into the junction box.
Step 5: Mount the Fixture
Attach the mounting bracket that came with your new fixture to the junction box using the provided screws. Align the fixture base with the bracket and secure it according to the manufacturer’s instructions. For heavier fixtures like chandeliers, ensure the junction box is rated for the weight.
Step 6: Install Bulbs and Shades
Insert the appropriate bulbs (check wattage limits specified by the manufacturer) and attach any glass shades, diffusers, or decorative elements. For LED fixtures with integrated bulbs, skip this step.
Step 7: Install Dimmer Switches (Optional)
If you’re adding dimmer functionality, replace the standard switch with a dimmer switch compatible with your bulb type (LED-compatible dimmers for LED bulbs). This provides flexibility in creating the perfect ambiance for different times of day.
Step 8: Test Your Installation
Restore power at the circuit breaker and test your new lighting. Check that all bulbs illuminate properly and that switches function correctly. If you installed a dimmer, test its full range of operation.
Step 9: Final Adjustments
Fine-tune the position of adjustable fixtures, ensure all decorative elements are properly secured, and clean any fingerprints or dust from the fixture surfaces. Step back and admire your newly transformed kitchen lighting!
Benefits / Advantages
Installing the right ceiling light fixtures in your kitchen provides numerous advantages that extend beyond simple illumination:
Enhanced Functionality:
Proper lighting dramatically improves your ability to perform kitchen tasks safely and efficiently. Bright, well-distributed light reduces eye strain during food preparation, makes it easier to read recipes, and helps you accurately assess food colors and textures while cooking. Under-lit kitchens can be dangerous, leading to cuts, burns, and other accidents.
Increased Home Value:
Updated lighting is one of the most cost-effective improvements you can make to increase your home’s resale value. Modern, energy-efficient fixtures signal to potential buyers that the home is well-maintained and updated with current standards.
Energy Efficiency:
Modern LED fixtures use up to 75% less energy than traditional incandescent bulbs and last up to 25 times longer. This translates to significant savings on your electricity bills and reduces the frequency of bulb replacements, saving both money and effort over time.
Aesthetic Transformation:
The right lighting fixtures serve as functional art pieces that complement your kitchen’s design style. Whether you prefer industrial pendants, farmhouse-inspired fixtures, or sleek modern designs, ceiling lights can tie together your entire kitchen aesthetic and create a cohesive look.
Mood and Ambiance Control:
Dimmable fixtures allow you to adjust lighting levels based on the time of day and activity. Bright lighting for morning meal prep can transition to softer, ambient lighting for evening entertaining, creating the perfect atmosphere for any occasion.
Improved Safety:
Well-lit kitchens reduce the risk of accidents while using sharp knives, hot surfaces, and other potentially dangerous equipment. Adequate lighting also helps identify spills and obstacles that could cause falls.
Space Perception:
Strategic lighting placement can make small kitchens appear larger and more open. Bright ceiling lights reflect off surfaces, creating an illusion of expanded space, while layered lighting adds depth and dimension to the room.
Tips, Alternatives, Styling Advice
Customize your kitchen lighting to match your specific needs, budget, and design preferences with these expert recommendations:
Budget-Friendly Alternatives:
– Consider attractive flush-mount fixtures instead of expensive chandeliers—they provide excellent illumination at a fraction of the cost
– Update existing fixtures with fresh coats of spray paint in trendy finishes like matte black or brushed gold
– Replace only the bulbs with decorative Edison-style LED bulbs for instant style improvement
– Shop end-of-season sales, clearance sections, or online marketplaces for discounted designer fixtures
Small Kitchen Solutions:
– Install slim-profile LED flush-mount fixtures that don’t visually clutter low ceilings
– Use recessed lighting to maintain clean lines and maximize perceived ceiling height
– Choose fixtures with multiple bulbs in a compact footprint for maximum light output
– Opt for cool white bulbs (4000-5000K) to make small spaces feel brighter and more open
Style-Specific Recommendations:
Modern/Contemporary:
– Geometric fixtures with clean lines and metallic finishes
– Integrated LED panels for seamless, minimalist appearance
– Track lighting with adjustable heads for customizable illumination
Farmhouse/Rustic:
– Wood-accented fixtures or metal cages with distressed finishes
– Mason jar pendants or lantern-style fixtures
– Warm white bulbs (2700-3000K) for cozy ambiance
Industrial:
– Exposed bulb fixtures with metal cages or wire frames
– Black iron or aged brass finishes
– Vintage-inspired Edison bulbs for authentic character
Traditional:
– Chandeliers with classic details and elegant lines
– Bronze or brushed nickel finishes
– Frosted glass shades for diffused, soft lighting
Layering Lighting Techniques:
Don’t rely solely on ceiling fixtures—create a comprehensive lighting plan by combining ambient (general) lighting from ceiling fixtures with task lighting (under-cabinet lights) and accent lighting (above-cabinet illumination) for a professionally designed look.
Color Temperature Guidelines:
– Warm white (2700-3000K): Creates cozy, inviting atmosphere; ideal for eating areas
– Neutral white (3500-4100K): Balanced light good for overall kitchen illumination
– Cool white (5000-6500K): Bright, energizing light perfect for detailed task work
Smart Home Integration:
Consider smart bulbs or switches that allow voice control, scheduling, and color-changing capabilities. Program lights to gradually brighten in the morning or automatically adjust based on natural daylight levels.
Common Mistakes to Avoid
Avoid these frequent pitfalls to ensure your kitchen lighting project is successful and safe:
Mistake 1: Insufficient Lighting Coverage
The Problem: Installing a single central fixture that leaves corners and work areas in shadow.
The Solution: Calculate your kitchen’s square footage and provide 50-100 lumens per square foot. Combine ceiling fixtures with supplemental task and accent lighting for complete coverage.
Mistake 2: Ignoring Ceiling Height
The Problem: Choosing fixtures that hang too low in kitchens with standard 8-foot ceilings, creating head-bumping hazards.
The Solution: Reserve pendant lights and chandeliers for islands or kitchens with 9+ foot ceilings. Use flush or semi-flush mounts for standard ceiling heights, ensuring at least 7 feet of clearance.
Mistake 3: Mismatched Finishes
The Problem: Selecting light fixtures in finishes that clash with existing cabinet hardware, faucets, and appliances.
The Solution: Create a cohesive look by matching or coordinating finishes. If your cabinet pulls are brushed nickel, choose lighting fixtures in the same or complementary finish.
Mistake 4: Wrong Color Temperature
The Problem: Mixing bulbs with different color temperatures, creating an unflattering and disjointed appearance.
The Solution: Select bulbs with consistent color temperature across all fixtures in the space. Test bulbs before committing to ensure you like the tone.
Mistake 5: Overlooking Dimming Capabilities
The Problem: Installing non-dimmable fixtures or bulbs with dimmer switches, causing flickering and premature bulb failure.
The Solution: Verify compatibility between bulbs, fixtures, and dimmer switches. Purchase LED-compatible dimmers specifically designed for your bulb type.
Mistake 6: Improper Electrical Connections
The Problem: Loose wire connections, reversed polarity, or inadequate grounding leading to safety hazards.
The Solution: Follow electrical codes precisely, ensure all connections are tight and properly insulated, and consider hiring a licensed electrician for complex installations.
Mistake 7: Neglecting the Fixture Weight Rating
The Problem: Installing heavy chandeliers on junction boxes not rated for the weight, risking fixture collapse.
The Solution: Check the weight rating of your existing junction box and upgrade to a fan-rated box if necessary for heavy fixtures.
Mistake 8: Ignoring Energy Efficiency
The Problem: Installing fixtures with outdated bulb types that waste energy and generate excessive heat.
The Solution: Choose ENERGY STAR certified fixtures and LED bulbs to minimize energy consumption and reduce cooling costs in your kitchen.
Maintenance / Upkeep Tips
Preserve the beauty and functionality of your kitchen ceiling lights with these simple maintenance practices:
Regular Cleaning Schedule:
Dust and grease accumulate quickly on kitchen light fixtures. Wipe down fixtures monthly with a soft, slightly damp microfiber cloth. For glass shades, remove them quarterly and wash with warm, soapy water, then dry thoroughly before reinstalling.
Bulb Replacement:
Keep spare bulbs on hand that match your fixtures’ specifications. When replacing bulbs, ensure power is off and the fixture has cooled completely. LED bulbs typically last 15,000-50,000 hours but eventually require replacement.
Annual Deep Cleaning:
Once yearly, turn off power and carefully remove all shades, covers, and decorative elements. Clean each component individually, checking for any signs of wear or damage. This is also an excellent time to inspect wiring connections for any looseness or corrosion.
Fixture Inspection:
Examine mounting hardware periodically to ensure everything remains secure. Tighten any loose screws and check that the fixture hasn’t shifted position. Look for discoloration around the mounting area, which could indicate overheating issues.
Updating for Trends:
Light fixtures can be easily updated without complete replacement. Swap out shades, change bulb styles to more contemporary options, or apply new finishes to existing fixtures to keep up with evolving design trends.
Smart Technology Maintenance:
If you’ve integrated smart bulbs or switches, regularly update firmware to access new features and security patches. Replace batteries in wireless switches as needed to maintain functionality.
Professional Inspection:
Consider having an electrician inspect your kitchen lighting every 5-10 years, especially in older homes. They can identify potential safety issues, verify connections remain code-compliant, and recommend upgrades.
Conclusion
Transforming your kitchen with updated Kitchen Ceiling Light Fixtures is one of the most impactful improvements you can make to enhance both the functionality and aesthetic appeal of your home’s most important gathering space. Throughout this guide, we’ve explored how the right kitchen ceiling lights can dramatically improve visibility for food preparation, create inviting ambiance for entertaining, increase energy efficiency, and add significant value to your property. From selecting the perfect style to match your décor to following proper installation procedures, avoiding common mistakes, and maintaining your fixtures for long-lasting performance, you now have all the knowledge needed to successfully complete this rewarding project.
Remember that lighting is not just about illumination—it’s about creating an atmosphere that makes your kitchen a place where you love to spend time. Whether you’re cooking weeknight dinners, hosting holiday gatherings, or simply enjoying your morning coffee, the right lighting sets the stage for all these precious moments. Don’t settle for dim, outdated fixtures that leave your kitchen feeling dull and uninviting.
Take action today: Assess your current kitchen lighting, measure your space, and begin exploring fixture options that align with your style preferences and functional needs. If you’re ready to elevate your kitchen experience, start shopping for fixtures that speak to your design sensibility, and don’t hesitate to consult with a licensed electrician for installations that exceed your comfort level. Your dream kitchen is just a light switch away—transform your space and illuminate the heart of your home with confidence!
FAQs
Q1: How many lumens do I need for my kitchen ceiling lights?
A: For general kitchen lighting, aim for 50-100 lumens per square foot. A 100-square-foot kitchen would require 5,000-10,000 total lumens from all light sources combined. Brighter task areas like countertops and islands may benefit from additional focused lighting beyond ceiling fixtures.
Q2: Can I install kitchen ceiling light fixtures myself, or should I hire an electrician?
A: If you’re simply replacing an existing fixture with a similar one and feel comfortable working with basic electrical connections, many homeowners can handle this as a DIY project. However, if you’re adding new circuits, relocating junction boxes, working with outdated wiring, or if you’re uncertain about any aspect of the electrical work, hiring a licensed electrician is the safest choice to ensure code compliance and safety.
Q3: What’s the difference between flush mount and semi-flush mount ceiling fixtures?
A: Flush mount fixtures sit directly against the ceiling with no gap, making them ideal for rooms with standard 8-foot ceilings or lower. Semi-flush mount fixtures hang 4-8 inches below the ceiling on a short stem, providing slightly more decorative appeal while still working well in spaces with limited ceiling height. Both provide excellent ambient lighting for kitchens.
Q4: How do I choose the right size ceiling light fixture for my kitchen?
A: A general rule is to add your kitchen’s length and width in feet, then convert that number to inches for your fixture diameter. For example, a 12-foot by 14-foot kitchen (12+14=26) would suit a fixture approximately 26 inches in diameter. For rectangular kitchens, you may need multiple fixtures or elongated designs to provide even coverage across the entire space.
Q5: Are LED fixtures worth the higher upfront cost?
A: Absolutely. While LED fixtures typically cost more initially, they use 75% less energy than incandescent bulbs and last up to 25 times longer. Most homeowners recoup the additional investment within 2-3 years through reduced energy bills and elimination of frequent bulb replacements. LED fixtures also generate less heat, reducing cooling costs during warmer months and providing more comfortable working conditions in your kitchen.