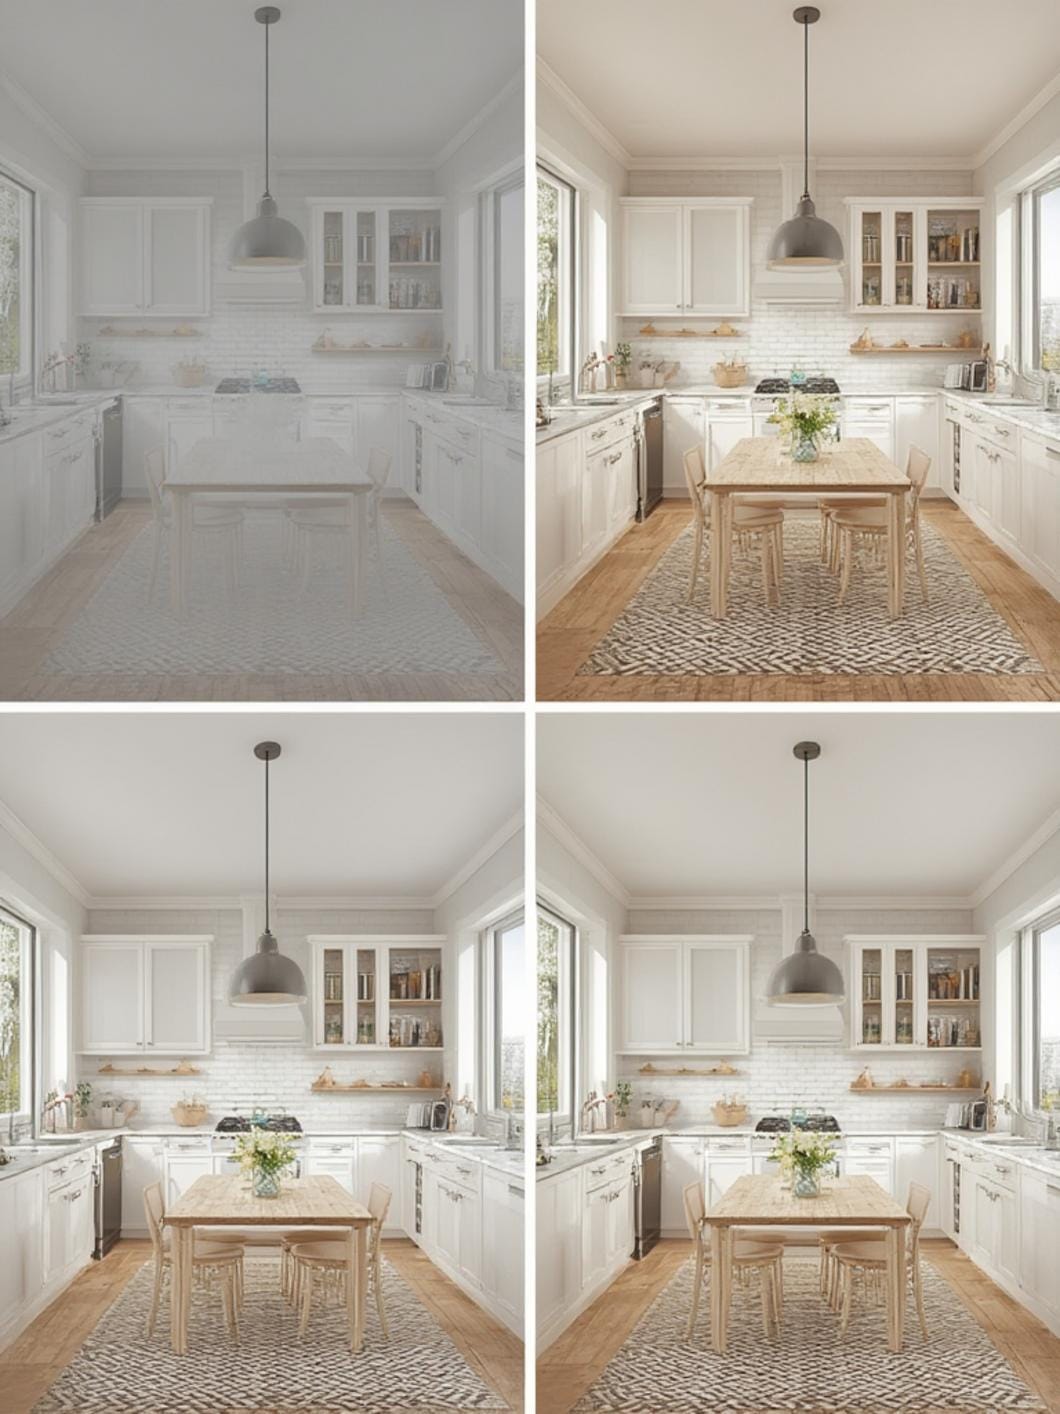
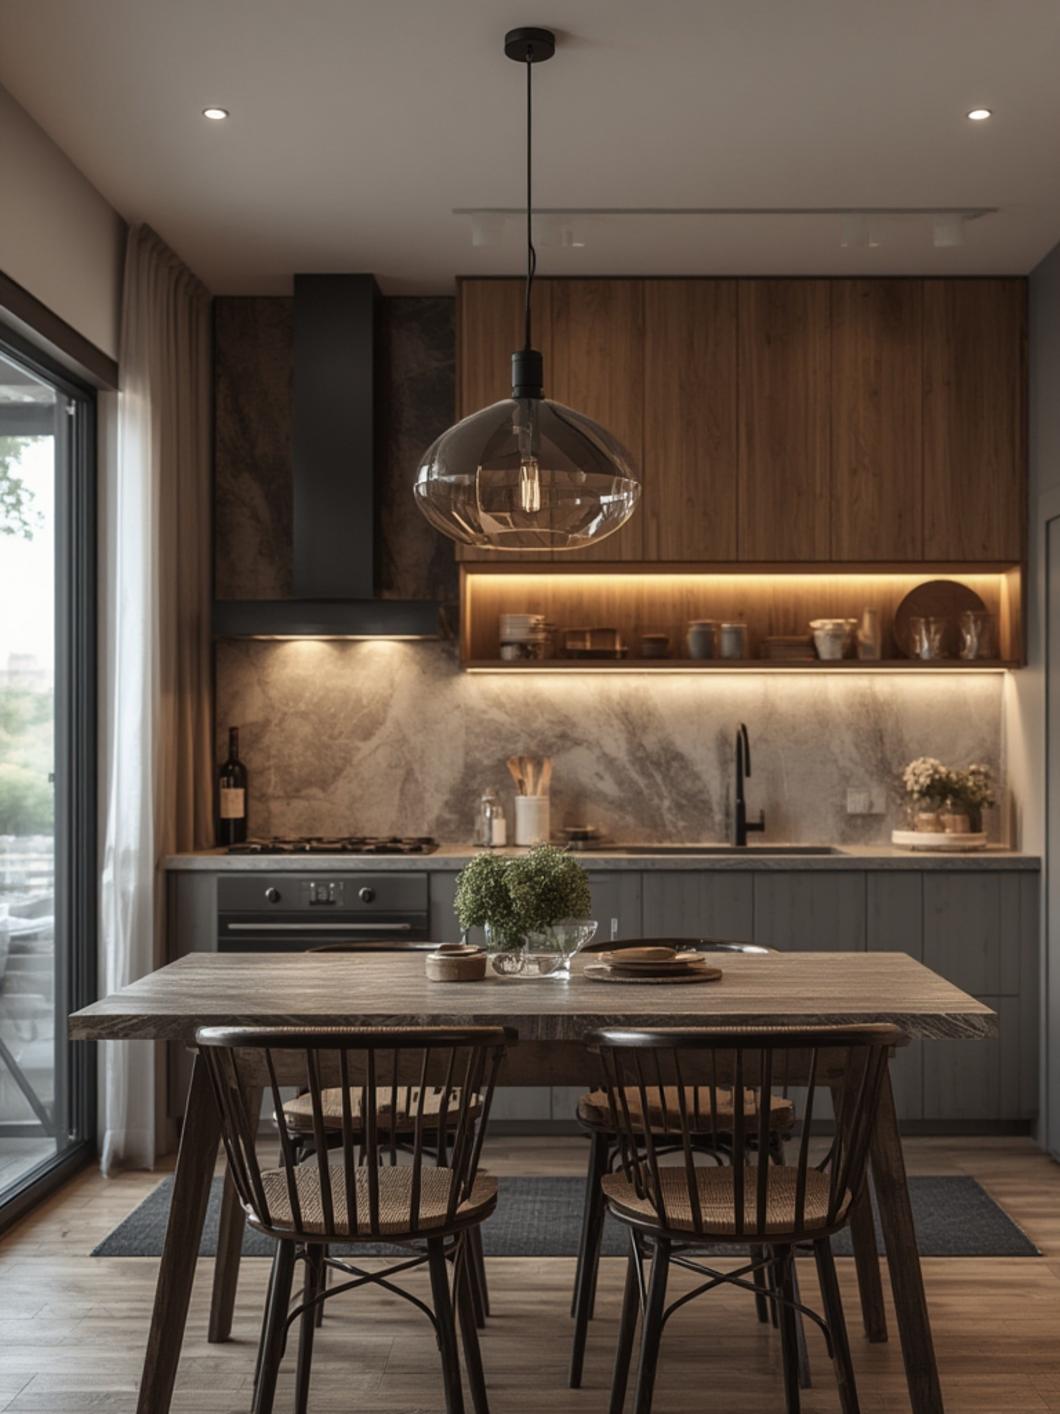
Kitchen Mini Pendant Lighting Guide: Transform Your Space with Perfect Illumination
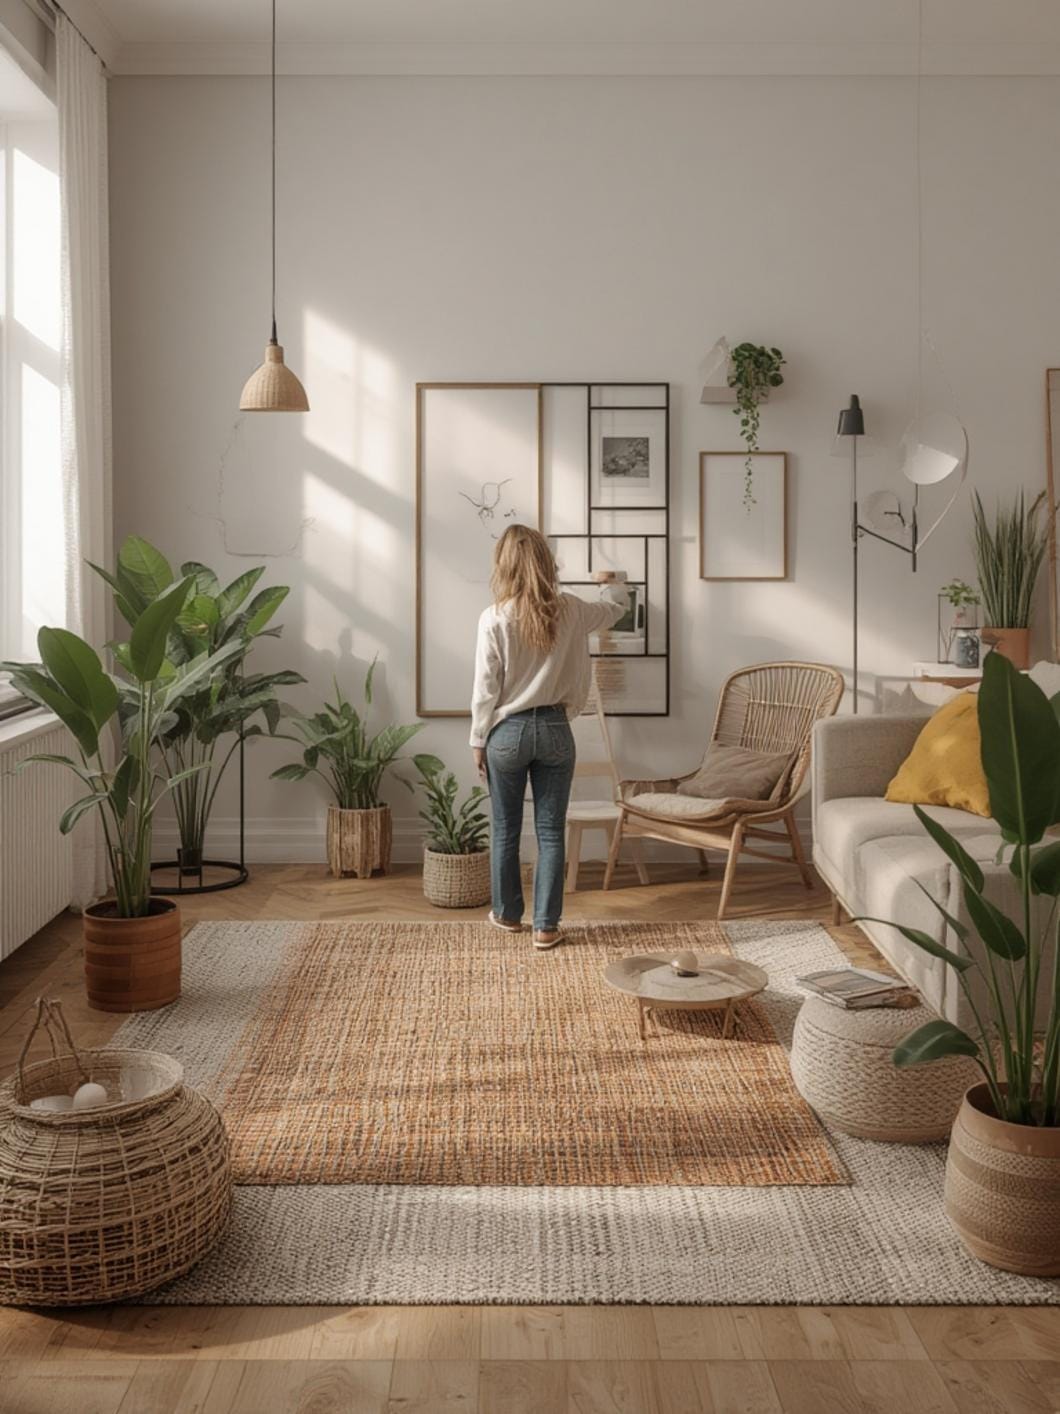
There’s something magical about the moment you step into a beautifully lit kitchen—the warm glow that makes everything feel inviting, the strategic illumination that turns meal preparation into a pleasure rather than a chore. Your kitchen deserves lighting that does more than just brighten the room; it should create ambiance, add personality, and enhance functionality. This Kitchen Mini Pendant Lighting Guide will walk you through everything you need to know about selecting, installing, and styling these versatile fixtures that have become the hallmark of modern kitchen design. Whether you’re renovating your entire kitchen or simply looking to upgrade your lighting, understanding how to properly implement kitchen pendant lights over island will transform your space from ordinary to extraordinary. Mini pendant lights offer the perfect blend of task lighting and decorative appeal, casting focused illumination exactly where you need it while serving as stunning focal points that reflect your personal style. Let’s explore how you can harness the power of these compact yet impactful fixtures to create a kitchen that’s both beautiful and brilliantly functional.
Table of Contents
Materials & Decor Elements
Before embarking on your kitchen lighting transformation, gathering the right materials and understanding your decor elements is crucial for a successful installation. Here’s your comprehensive checklist:
Essential Lighting Fixtures:
– Mini pendant lights (typically 2-3 fixtures for standard islands)
– Appropriate light bulbs (LED recommended for energy efficiency)
– Dimmer switches (for adjustable ambiance)
– Mounting hardware and ceiling canopies
Installation Tools:
– Wire stripper and wire nuts
– Screwdriver set (flathead and Phillips)
– Voltage tester
– Drill with appropriate bits
– Stud finder
– Measuring tape
– Pencil for marking
– Ladder or step stool
– Safety glasses
Decorative Considerations:
– Pendant shades in glass, metal, or fabric
– Coordinating finishes (brass, bronze, nickel, matte black)
– Cord or chain in complementary style
– Junction box or ceiling medallions for aesthetic appeal
Planning Materials:
– Graph paper for layout planning
– Painter’s tape for visualizing placement
– Light meter (optional, for measuring existing illumination)
Electrical Supplies:
– Junction boxes (if not already installed)
– Electrical wire (14 or 12-gauge, depending on circuit)
– Wire connectors
– Electrical tape
– Cable clamps
Timing / Project Planning
Understanding the timeline for your pendant lighting project helps set realistic expectations and ensures proper preparation. The total time investment varies based on your experience level and whether you’re replacing existing fixtures or installing completely new ones.
Preparation Phase (1-3 Days):
The planning stage is where your vision takes shape. Spend time researching styles that complement your kitchen’s aesthetic, measuring your island dimensions, and calculating the ideal spacing. Visit showrooms or browse online to compare options, read reviews, and ensure the fixtures you choose provide adequate illumination. If electrical work is needed beyond simple fixture replacement, schedule a consultation with a licensed electrician. This phase also includes ordering your materials, which may take 3-7 business days for delivery.
Installation Phase (2-6 Hours):
For straightforward replacement of existing fixtures with similar mini pendants, expect 2-3 hours for a set of three lights. This assumes electrical boxes are already in place and compatible with your new fixtures. If you’re installing pendants where no fixtures previously existed, the project extends to 4-6 hours, factoring in ceiling work, running new wiring, and installing junction boxes. First-time DIYers should add an additional 1-2 hours to familiarize themselves with safety protocols and double-check connections.
Adjustment and Fine-Tuning (30 Minutes – 1 Hour):
After installation, you’ll need time to adjust pendant heights, ensure level alignment, test dimmer functionality, and make any minor tweaks. This seemingly small step dramatically impacts the final appearance and effectiveness of your lighting.
Professional Installation Consideration:
If hiring an electrician, the actual installation time may be shorter (1-3 hours), but scheduling may require waiting several days to weeks depending on availability in your area.
Step-by-Step Instructions
Creating the perfect lighting setup with your Kitchen Mini Pendant Lighting Guide requires careful attention to detail and methodical execution. Follow these comprehensive steps to achieve professional-looking results:
Step 1: Turn Off Power and Verify
Before beginning any electrical work, locate your circuit breaker panel and switch off power to the kitchen lighting circuit. Use a voltage tester on the existing fixture or wires to confirm electricity is completely off. Never skip this critical safety step—working with live electrical current can be fatal.
Step 2: Determine Optimal Placement
For kitchen pendant lights over island, measure your island length and mark the center point. For islands 4-6 feet long, install two pendants spaced evenly with 24-30 inches between them. For islands 6-8 feet or longer, three pendants work best, with spacing of 24-32 inches apart. Pendants should hang 30-36 inches above the countertop surface for optimal illumination without obstructing sightlines.
Step 3: Install Mounting Hardware
If junction boxes aren’t present, this requires cutting drywall, running electrical cable, and securing boxes to ceiling joists—a job best left to professionals unless you have electrical experience. For existing boxes, remove old fixtures and ensure boxes are rated for the weight of your new pendants. Install the mounting bracket that comes with your pendant fixtures according to manufacturer instructions.
Step 4: Prepare the Wiring
Strip approximately ¾ inch of insulation from the ends of both the fixture wires and the house wires using your wire stripper. You’ll typically see three wires: black (hot), white (neutral), and green or bare copper (ground). Group the wires by color—black to black, white to white, and ground to ground.
Step 5: Connect the Wires
Twist together the matching colored wires clockwise, then secure with wire nuts by twisting them clockwise over the twisted wires. Tug gently to ensure connections are secure. Wrap electrical tape around the base of each wire nut for added security. Carefully tuck the connected wires into the junction box, ensuring no bare wire is exposed.
Step 6: Attach the Canopy and Pendant
Secure the mounting bracket to the junction box, then attach the canopy (the decorative cover that hides the electrical connection) according to your fixture’s instructions. Thread the pendant cord or chain through the canopy, adjust to your desired height, and secure using the provided locking mechanism or set screws.
Step 7: Install Light Bulbs and Shades
Screw in your chosen light bulbs—LED bulbs in the 2700-3000K color temperature range provide warm, inviting light perfect for kitchens. Attach any glass shades, diffusers, or decorative elements that complete your pendant design.
Step 8: Restore Power and Test
Return to your circuit breaker and switch the power back on. Test your new pendants with the wall switch. If you’ve installed a dimmer, test the full range of brightness levels to ensure proper functionality.
Step 9: Make Final Adjustments
Stand back and evaluate the visual balance of your pendants. Adjust heights if needed to ensure they’re level with each other. The bottom of the pendants should create a horizontal line when viewed from the side. Take measurements to confirm symmetrical spacing.
Benefits / Advantages
Installing mini pendant lights over your kitchen island delivers remarkable advantages that extend far beyond simple illumination:
Enhanced Task Lighting:
Mini pendants provide focused, directional light exactly where you need it most. Whether you’re chopping vegetables, reviewing recipes, or helping children with homework at the island, properly positioned pendants eliminate shadows and reduce eye strain. Unlike general overhead lighting that creates a uniform wash, pendants concentrate light on work surfaces, making food preparation safer and more efficient.
Architectural Interest and Visual Appeal:
These fixtures serve as jewelry for your kitchen, adding vertical dimension and drawing the eye upward to create the illusion of higher ceilings. The interplay of light and shadow created by pendant shades adds depth and texture to your space. Available in countless styles—from industrial metal cages to elegant blown glass—mini pendants allow you to express your design personality and tie together your kitchen’s aesthetic theme.
Flexibility and Scalability:
Unlike fixed recessed lighting, pendant lights offer adjustable height options, allowing you to customize the light level and ambiance for different occasions. Hosting a dinner party? Raise them slightly and dim the light for intimate conversation. Preparing a complex meal? Lower them and increase brightness for maximum visibility. This adaptability makes pendants remarkably versatile for the multifunctional role modern kitchens play.
Improved Home Value:
Quality lighting fixtures are consistently cited by real estate professionals as high-impact upgrades that influence buyer perception. Well-chosen pendant lights signal that a home has been thoughtfully updated with attention to both function and style. According to design experts, updated lighting can provide a return on investment of 50-100% when selling your home.
Energy Efficiency:
When paired with LED bulbs, mini pendants consume significantly less electricity than traditional lighting solutions while providing superior illumination. LED technology has advanced to offer warm, flattering color temperatures that enhance food appearance and create welcoming ambiance, all while reducing your energy bills by up to 75% compared to incandescent bulbs.
Defined Zones:
In open-concept homes, pendant lighting helps visually separate the kitchen workspace from adjacent living areas, creating distinct zones without walls. This subtle delineation maintains the open, flowing feel while establishing clear functional boundaries that help organize your space psychologically.
Tips, Alternatives, Styling Advice
Maximizing the impact of your kitchen pendant lighting involves understanding various approaches and customization options:
Budget-Friendly Alternatives:
Quality pendant lighting doesn’t require breaking the bank. Consider mixing high and low—invest in one statement pendant as a centerpiece with more affordable coordinating fixtures flanking it. Shop clearance sections at home improvement stores, where discontinued styles often sell at 50-70% off. Online marketplaces and architectural salvage shops offer unique vintage fixtures that add character at a fraction of retail prices. DIY shade replacement can transform basic pendant frames with custom fabric, woven materials, or painted finishes that reflect your style for under $20 per fixture.
Small Space Solutions:
For compact kitchens or narrow islands, scale matters tremendously. Choose slimmer pendants with a diameter of 6-8 inches rather than oversized fixtures that overwhelm the proportions. Two smaller pendants often work better than three in limited spaces. Consider clear or translucent glass shades that provide visual interest without creating visual bulk. Alternatively, a single linear pendant—a fixture with multiple lights arranged along one bar—can illuminate a small island efficiently without crowding the visual space.
Style Coordination Strategies:
Your pendants should complement, not compete with, existing kitchen elements. For traditional kitchens with warm wood cabinetry, consider bronze or copper pendants with classic bell or dome shapes. Modern kitchens benefit from geometric designs in brushed nickel, matte black, or polished chrome. Farmhouse styles pair beautifully with industrial cage pendants, mason jar fixtures, or milk glass shades. Transitional kitchens—the increasingly popular middle ground between traditional and contemporary—work well with simplified classic shapes in updated finishes like brushed gold or oil-rubbed bronze.
Layered Lighting Approach:
Mini pendants work best as part of a comprehensive lighting plan. Combine them with under-cabinet lighting for task illumination at prep areas, recessed lighting for general ambient light, and toe-kick lighting for subtle nighttime navigation. This layered approach ensures your kitchen functions beautifully at any time of day while creating depth and visual interest.
Color Temperature Considerations:
The warmth or coolness of your light dramatically affects kitchen ambiance. For a cozy, inviting feel, choose bulbs rated 2700-3000K (warm white). If your kitchen features cool gray or white color schemes, 3000-3500K (neutral white) prevents the space from feeling too yellow. Avoid bulbs above 4000K in residential kitchens—they create the harsh, clinical feeling of commercial spaces.
Shade Selection Impact:
Transparent or open shades maximize light output and work well for task-oriented applications. Opaque or semi-opaque shades create more ambient lighting with reduced glare, ideal for kitchens that double as gathering spaces. Downward-facing shades concentrate light on the island surface, while multi-directional or open-top designs provide both task and ambient illumination.
Common Mistakes to Avoid
Learning from common pitfalls ensures your pendant lighting project succeeds beautifully:
Mistake 1: Incorrect Hanging Height
Hanging pendants too low obstructs sightlines and creates head-bumping hazards, while positioning them too high diminishes their effectiveness as task lighting. Solution: Maintain 30-36 inches between the pendant bottom and countertop surface. For households with exceptionally tall family members, adjust to 36-38 inches. Use adjustable-cord pendants if you’re uncertain, allowing future modifications.
Mistake 2: Poor Spacing Decisions
Cramming pendants too close together creates harsh, overlapping light pools with dark gaps between, while spacing them too far apart leaves portions of your island in shadow. Solution: For standard 12-inch diameter pendants, maintain 24-30 inches between fixtures measured from center to center. Larger pendants require proportionally greater spacing. The combined width of all pendants should not exceed two-thirds of your island length.
Mistake 3: Mismatched Scale
Oversized pendants overwhelm small islands while tiny fixtures appear insignificant over large expanses. Solution: For islands 4-5 feet long, choose pendants 8-12 inches in diameter. For 6-7 foot islands, select 10-14 inch fixtures. Islands 8 feet or longer can accommodate 12-18 inch pendants. When in doubt, create paper templates of your prospective pendant sizes and tape them to the ceiling to visualize proportions before purchasing.
Mistake 4: Ignoring Existing Architecture
Installing pendants without considering ceiling height, cabinet placement, or window locations leads to awkward visual conflicts. Solution: In kitchens with 8-foot ceilings, choose more compact pendants with shorter hanging lengths to avoid a cluttered appearance. Ensure pendants don’t block views through windows or interfere with cabinet doors. Account for ceiling fans, range hoods, and other fixtures in your planning.
Mistake 5: Inadequate Lighting Output
Beautiful fixtures that don’t provide sufficient illumination defeat the purpose of task lighting. Solution: Calculate lumens rather than relying on wattage. For effective island task lighting, aim for 35-50 lumens per square foot. A 6-foot island (approximately 16 square feet) requires 560-800 total lumens. Distribute this across your pendants—three fixtures would each need bulbs providing 185-265 lumens. Always choose dimmable bulbs for flexibility.
Mistake 6: Forgetting Dimmer Compatibility
Not all LED bulbs work with all dimmer switches, resulting in annoying flickering or buzzing. Solution: Verify that your bulbs are specifically labeled “dimmable” and check manufacturer recommendations for compatible dimmer switches. Purchase a dimmer designed for LED technology—older dimmers designed for incandescent bulbs often cause performance issues with modern LED bulbs.
Mistake 7: Neglecting the View from All Angles
Pendants that look perfect from the kitchen entrance may be visually awkward from the family room or dining area in open-concept homes. Solution: During the planning phase, view your marked pendant positions from multiple vantage points throughout connected spaces. Consider how the fixtures will appear from your most-used seating areas and adjust placement accordingly.
Maintenance / Upkeep Tips
Protecting your investment and keeping your pendant lights looking pristine requires minimal but consistent maintenance:
Regular Dusting and Cleaning:
Dust accumulates on pendant surfaces, dulling their finish and reducing light output by up to 30%. Weekly dusting with a microfiber cloth prevents buildup. For deeper cleaning, remove glass or metal shades monthly and wash with warm water and mild dish soap. Dry thoroughly before reinstalling to prevent water spots. For hard-to-reach fixtures, extendable dusters with bendable heads allow cleaning without removing the shades.
Bulb Replacement Protocol:
LED bulbs typically last 15,000-25,000 hours, but eventual replacement is inevitable. When one bulb burns out, replace all pendants’ bulbs simultaneously to maintain consistent color temperature and brightness. Keep a record of the bulb specifications (wattage equivalent, color temperature, and lumens) so replacements match perfectly. Before changing bulbs, always turn off power at the switch and allow bulbs to cool for at least 10 minutes.
Electrical Connection Inspection:
Annually, inspect visible wiring for any signs of fraying, discoloration, or loose connections. If you notice flickering lights, buzzing sounds, or intermittent operation, turn off power immediately and investigate. These symptoms often indicate loose wire connections that should be tightened. If problems persist, consult a licensed electrician—electrical issues can pose fire hazards.
Hardware Tightening:
The vibration from daily household activity can gradually loosen mounting hardware and set screws. Every 6-12 months, check that canopies are secure against the ceiling, cords are properly locked at the desired height, and any decorative elements remain firmly attached. A quick visual inspection during your regular cleaning routine helps catch issues before pendants become dangerously loose.
Finish Protection:
Different pendant finishes require specific care. Brass and copper develop natural patina over time—embrace this aging or use metal polish to restore original luster. Powder-coated finishes benefit from occasional application of furniture wax to protect against scratches and moisture. Avoid abrasive cleaners on any finish, as they create microscopic scratches that accumulate dirt. For glass shades, a 50/50 mixture of white vinegar and water creates streak-free shine.
Seasonal Deep Cleaning:
Twice yearly, perform thorough maintenance including checking for insect intrusion (dead bugs reduce light transmission and look unsightly), tightening all connections, cleaning hard-to-reach crevices with cotton swabs, and verifying that dimmer switches operate smoothly through their full range. This preventive approach extends fixture lifespan and maintains optimal performance.
Style Updates:
Rather than replacing entire fixtures when design preferences evolve, consider updating just the shades, bulbs, or cords. Many pendant systems allow shade swaps, offering a cost-effective refresh. Colored or Edison-style bulbs can dramatically change ambiance without renovating. Cord covers in fabric or braided materials provide an instant style update for under $15 per fixture.
Conclusion
Transforming your kitchen with thoughtfully selected and properly installed mini pendant lighting creates an immediate visual impact while dramatically improving functionality. This Kitchen Mini Pendant Lighting Guide has equipped you with the knowledge to confidently navigate every aspect of your lighting project—from selecting fixtures that perfectly complement your style to executing professional-quality installation, avoiding common pitfalls, and maintaining your investment for years of beautiful illumination. The strategic placement of kitchen pendant lights over island elevates your space from merely functional to genuinely inspiring, creating a focal point that draws family and friends together while providing the practical lighting that makes your kitchen work harder for you. Whether you’ve chosen sleek modern fixtures, rustic farmhouse pendants, or timeless traditional designs, your new lighting will enhance daily routines and special gatherings alike. Now is the perfect time to move forward with your kitchen lighting transformation—measure your space, explore the countless pendant styles available, and begin creating the kitchen ambiance you’ve always envisioned. Remember that lighting is one of the most cost-effective yet impactful updates you can make to your home, and the rewards of a well-lit, beautifully designed kitchen extend far beyond aesthetics to touch every moment spent in this essential gathering space. Take action today, and soon you’ll be enjoying the warmth, functionality, and undeniable appeal of perfectly placed pendant lighting that makes your kitchen shine.
FAQs
Q: How many mini pendant lights do I need over my kitchen island?
A: The number depends on your island length. For islands 4-5 feet long, two pendants provide adequate coverage. Islands 6-7 feet work best with three pendants. For particularly long islands (8+ feet), consider four fixtures or transitioning to larger statement pendants. The key is balanced spacing—measure the island length, divide by the number of pendants plus one, and position fixtures at those intervals for symmetrical distribution.
Q: Can I install pendant lights myself, or do I need an electrician?
A: If you’re replacing existing light fixtures with pendants and the electrical boxes are already properly installed, this is a manageable DIY project for homeowners comfortable with basic electrical work—provided you follow safety protocols and turn off power at the circuit breaker. However, if you need to install new junction boxes, run new wiring, or aren’t confident working with electricity, hiring a licensed electrician is the safer choice. Electrical mistakes can create fire hazards and code violations that affect home insurance and resale value.
Q: What’s the ideal wattage for kitchen pendant lights?
A: With LED technology, focus on lumens rather than watts. Each pendant should provide approximately 400-800 lumens for effective task lighting over islands. This typically translates to LED bulbs rated 6-10 watts (equivalent to 40-60 watt incandescent bulbs). For the best results, install dimmable bulbs allowing adjustment from bright task lighting during food preparation to softer ambient lighting during entertaining. Total lumens should provide 35-50 lumens per square foot of island surface area.
Q: Should pendant lights match my other kitchen fixtures?
A: Coordination rather than exact matching creates the most sophisticated look. Your pendants should complement—not identically duplicate—other fixtures like cabinet hardware, faucets, and appliances. Choose finishes within the same family (all warm tones like brass and copper, or all cool tones like chrome and nickel) while varying the styles slightly to create visual interest. Many designers successfully mix metals intentionally, combining matte black pendants with brushed gold hardware, for example, as long as the overall style remains cohesive.
Q: How do I clean pendant lights without removing them?
A: For routine cleaning, use a microfiber duster or cloth to wipe down accessible surfaces weekly. For glass pendants, spray glass cleaner on your cloth (never directly on the fixture, which can drip into electrical components) and wipe clean. A cotton swab dampened with rubbing alcohol effectively cleans intricate metalwork and crevices. For deeper cleaning without full removal, turn off power, carefully detach just the shade portion if your fixture design allows, clean thoroughly, dry completely, and reattach. This avoids disconnecting electrical components while still achieving pristine results.