How to Choose the Perfect Number of Lights Over Your Kitchen Island
When you walk into a beautifully designed kitchen, one of the first things that catches your eye is the lighting above the island. It’s not just about illumination—it’s about creating a focal point that transforms your entire space. Getting the right number of How Many Lights Over a Kitchen Island can make the difference between a dimly lit workspace and a stunning, functional centerpiece that elevates your home’s value and your daily cooking experience. Understanding kitchen island lighting spacing guidelines is essential for achieving that perfect balance between form and function. Whether you’re renovating your existing kitchen or designing a new one, this comprehensive guide will walk you through every aspect of selecting, spacing, and installing the ideal number of pendant lights over your kitchen island, ensuring your space is both beautiful and practical.
Table of Contents
Materials & Decor Elements
Before you begin your kitchen island lighting project, gather these essential materials and tools:
Lighting Fixtures:
– Pendant lights (quantity to be determined based on island size)
– Coordinating light bulbs (LED recommended for energy efficiency)
– Dimmer switches for adjustable ambiance
– Ceiling canopy or mounting hardware
Installation Tools:
– Voltage detector for safety
– Wire strippers and cutters
– Screwdrivers (flathead and Phillips)
– Drill with appropriate bits
– Measuring tape and level
– Pencil for marking positions
– Ladder or step stool
Electrical Components:
– Junction boxes (if not already installed)
– Electrical wire and connectors
– Wire nuts and electrical tape
– Circuit breaker access
Planning Materials:
– Graph paper for layout planning
– Calculator for spacing measurements
– Manufacturer’s installation instructions
– Masking tape for temporary marking
Timing / Project Planning
Preparation Phase (1-2 weeks):
The planning stage is crucial for success. Spend time measuring your kitchen island dimensions, researching lighting styles that complement your existing decor, and determining your budget. Browse showrooms, consult with lighting specialists, and order your fixtures with enough lead time for delivery. If electrical work is needed, schedule a licensed electrician at least one week in advance.
Installation Timeline (4-8 hours):
For those with electrical experience, installing kitchen island lights typically takes 4-6 hours for a straightforward project. This includes turning off power, installing mounting hardware, running or connecting wiring, attaching fixtures, and testing. If you’re hiring a professional electrician, the actual installation may take 2-4 hours, though scheduling might extend the overall timeline. Factor in additional time if you’re adding new electrical circuits or moving existing junction boxes.
Post-Installation Adjustments (1-2 days):
After installation, you’ll want to live with your lighting for a day or two to assess brightness levels, spacing effectiveness, and overall aesthetic impact. This period allows you to make adjustments to dimmer settings and confirm that the illumination meets your functional needs during different times of day.
Step-by-Step Instructions
Step 1: Calculate the Optimal Number of Lights
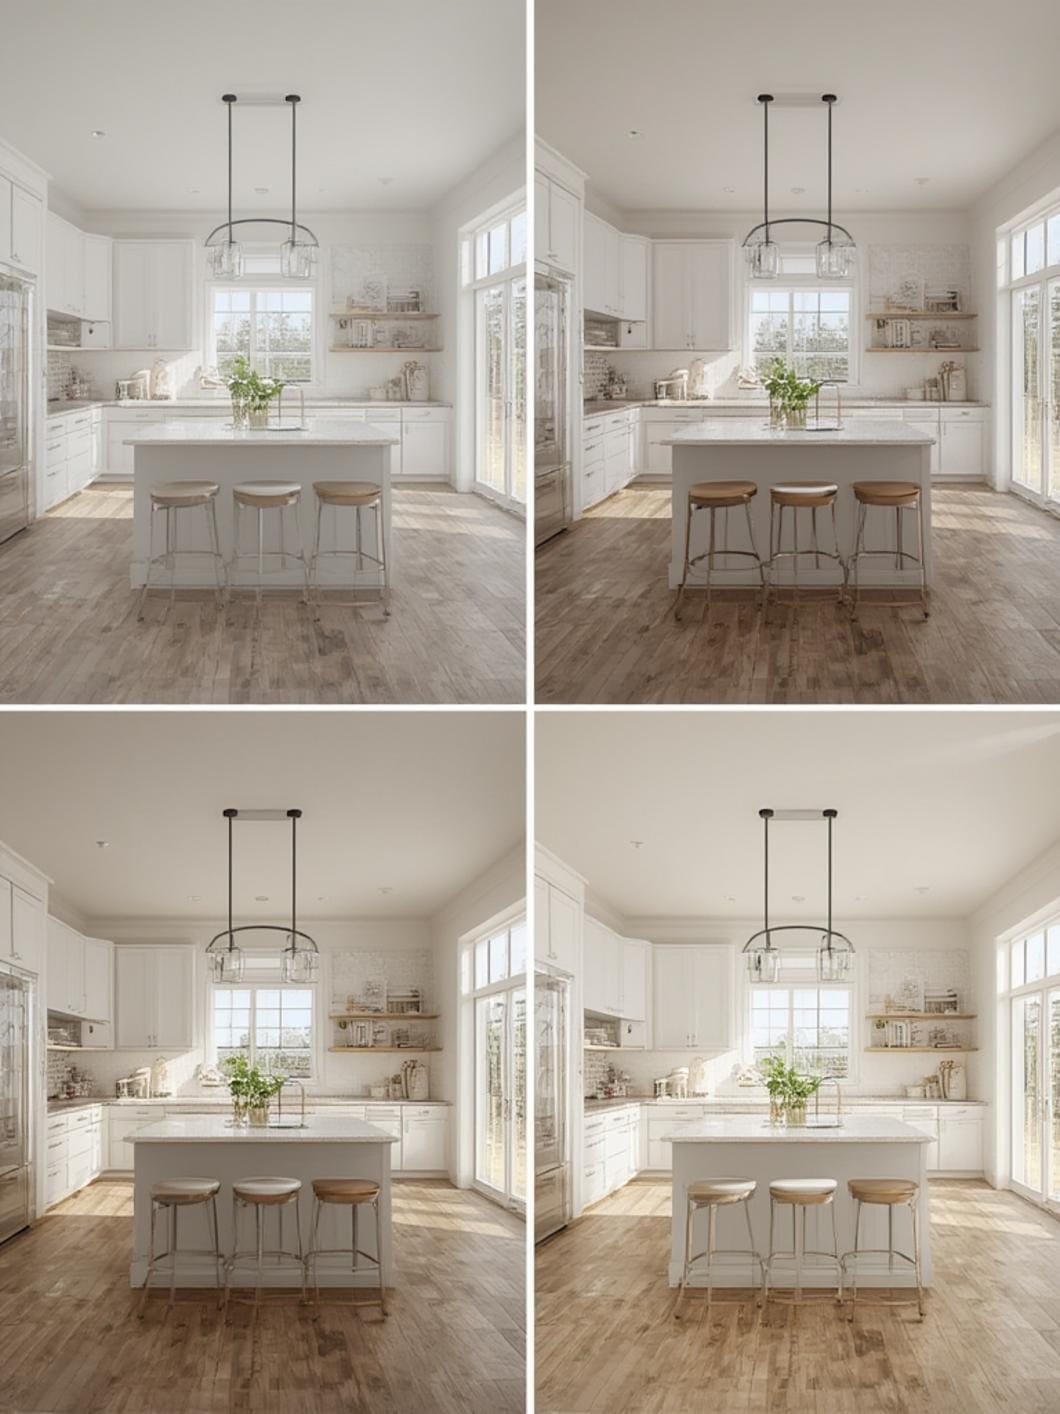
The fundamental question of How Many Lights Over a Kitchen Island depends primarily on your island’s length. Follow this proven formula: For islands 4-5 feet long, install 2 pendant lights. For islands 5-6 feet long, use 3 pendants. Islands 7-8 feet long require 3-4 lights, while islands over 8 feet benefit from 4-5 fixtures. This approach ensures balanced illumination without overcrowding.
Step 2: Apply Professional Spacing Guidelines
Once you’ve determined quantity, apply kitchen island lighting spacing guidelines for optimal placement. Space pendants 24-30 inches apart from center to center. Maintain 12-18 inches of clearance from each end of the island to the first light. This spacing prevents shadows while creating visual harmony. For example, on a 6-foot island with three lights, you’d place them at approximately 18 inches from each edge with 30 inches between fixtures.
Step 3: Determine Hanging Height
Measure 30-36 inches from the island countertop to the bottom of the pendant fixture. This height provides adequate illumination without obstructing sightlines across the kitchen. For islands with seating, ensure pendants don’t interfere with standing or seated positions. Taller individuals may prefer lights at 36 inches, while compact kitchens work well with 30-32 inch clearances.
Step 4: Mark Your Ceiling Positions
Using your calculations, measure and mark pendant positions on the ceiling with a pencil. Double-check measurements before drilling. Use masking tape to create temporary markers and step back to visualize the layout from multiple angles. Have someone hold the fixtures at marked positions while you assess the visual balance.
Step 5: Install Electrical Infrastructure
Turn off power at the circuit breaker and verify it’s off using a voltage detector. If junction boxes aren’t already positioned, this is the time to install them or hire an electrician. Run electrical wire between boxes if installing multiple pendants, ensuring connections meet local electrical codes. Connect wiring according to manufacturer instructions—typically black to black (hot), white to white (neutral), and green or bare copper to ground.
Step 6: Mount the Pendant Fixtures
Attach mounting brackets to junction boxes, securing them firmly with provided hardware. Connect fixture wires to house wiring using wire nuts, wrapping connections with electrical tape for added security. Carefully tuck wires into the junction box and attach the canopy plate. Install the pendant shade or globe according to manufacturer specifications.
Step 7: Install Bulbs and Test
Screw in appropriate wattage bulbs—LED bulbs between 60-75 watt equivalent provide excellent illumination while remaining energy efficient. Restore power at the circuit breaker and test each fixture. Check for flickering, proper dimmer function, and even illumination across the island surface. Make height adjustments if necessary.
Benefits / Advantages
Enhanced Functionality:
Properly spaced kitchen island lighting eliminates shadows and dark spots, making food preparation safer and more enjoyable. Multiple light sources provide layered illumination that adapts to various tasks—from detailed chopping work to casual dining.
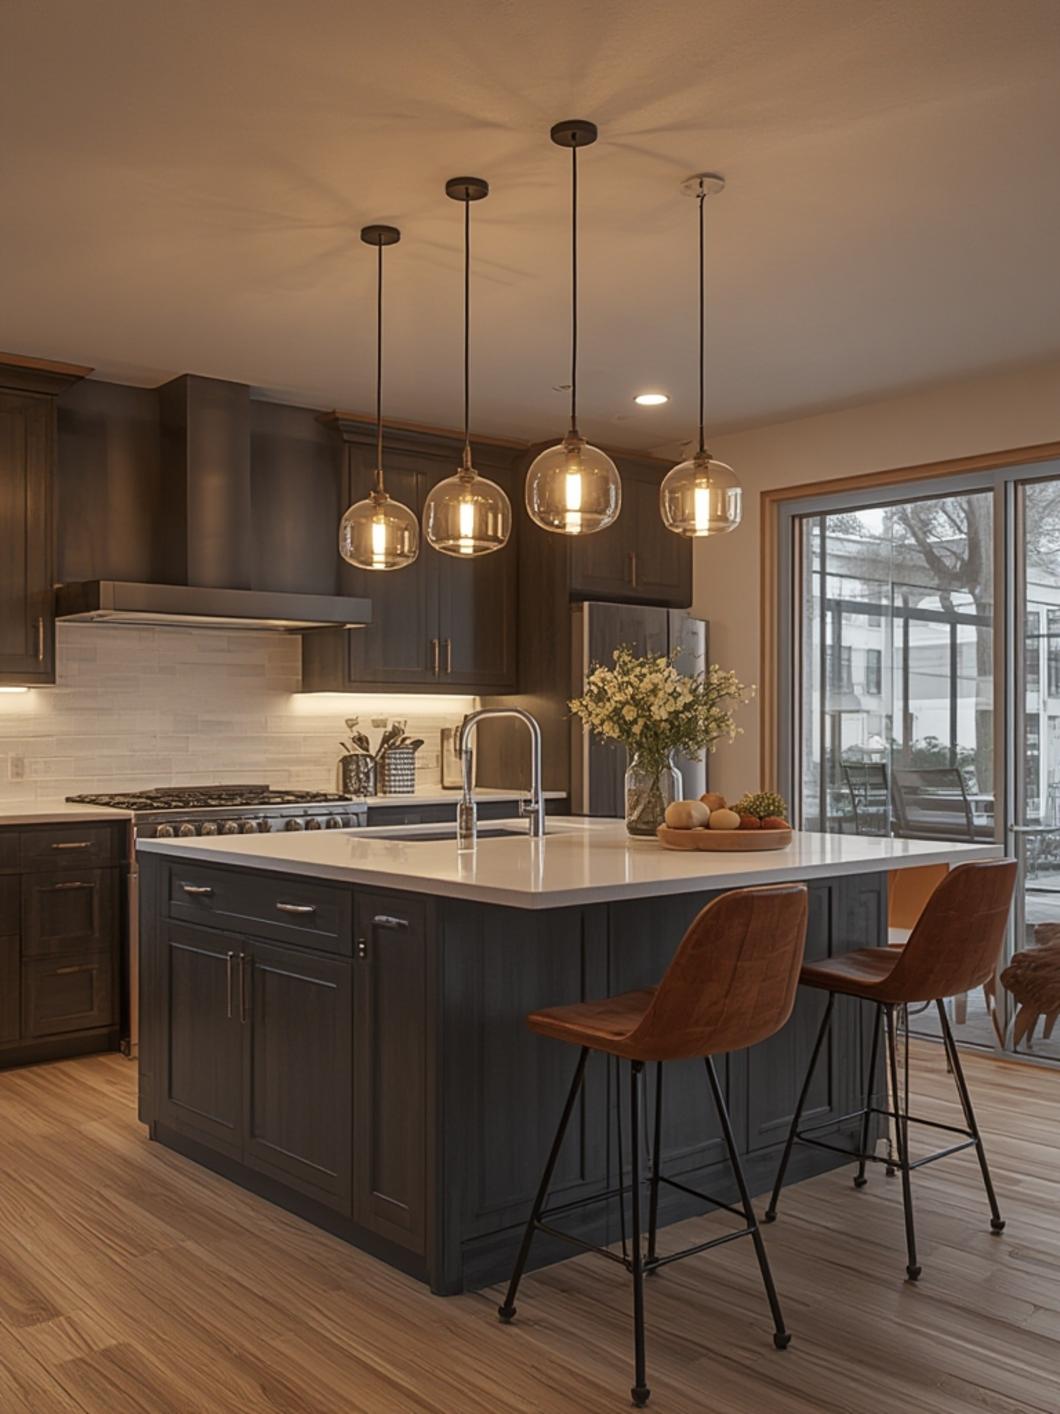
Aesthetic Appeal:
Pendant lights serve as jewelry for your kitchen, adding personality and style that reflects your taste. They create a finished, designer look that increases your home’s perceived value and makes the space more inviting for family and guests.
Energy Efficiency:
Modern LED pendants consume significantly less electricity than traditional fixtures while providing superior light quality. The ability to dim lights further reduces energy consumption and extends bulb lifespan, saving money over time.
Improved Home Value:
Real estate professionals consistently note that updated kitchen lighting ranks among the top features buyers notice. Well-designed island lighting can yield a strong return on investment when selling your home.
Versatile Ambiance:
With dimmer controls, you can transform your kitchen’s mood from bright and energizing during morning routines to soft and intimate for evening entertaining, all with the same fixtures.
Tips, Alternatives, Styling Advice
Budget-Friendly Alternatives:
If premium designer pendants exceed your budget, consider mixing high-low elements. Invest in one statement piece for the center position and flank it with more affordable coordinating fixtures. Alternatively, DIY pendant conversion kits can transform unique finds from thrift stores or flea markets into custom lighting for under $30 per fixture.
Small Space Solutions:
For compact kitchens with islands under 4 feet, two mini pendants or a single linear fixture can provide adequate lighting without overwhelming the space. Choose fixtures with smaller shades (8-10 inches in diameter) to maintain proportional balance.
Style Coordination:
Match your pendant finish to other kitchen hardware—cabinet pulls, faucets, and appliance finishes—for a cohesive design. In transitional kitchens, mixed metals work beautifully when there’s a unifying element like a consistent shape or material.
Shade Selection Strategy:
Glass or open-bottom shades direct light downward for task illumination, while opaque or drum shades create ambient lighting with a softer glow. Consider frosted glass for a happy medium that reduces glare while providing focused light.
Layered Lighting Approach:
Don’t rely solely on island pendants. Combine them with recessed ceiling lights, under-cabinet lighting, and toe-kick illumination for a professional, multi-dimensional lighting scheme that adapts to any situation.
Trending Alternatives:
Linear suspension fixtures offer a contemporary alternative to individual pendants, providing continuous illumination across longer islands. Clustered pendants at varying heights create artistic visual interest in modern or eclectic kitchens.
Common Mistakes to Avoid
Mistake #1: Incorrect Sizing
Many homeowners select fixtures that are too small or too large for their island. A pendant should be approximately one-third to one-half the width of the island section it illuminates. For a 30-inch wide island section, choose pendants 10-15 inches in diameter.
Solution: Measure your island dimensions before shopping and use the one-third rule as your guide. In showrooms, fixtures often appear smaller than they’ll look in your kitchen.
Mistake #2: Poor Spacing Decisions
Clustering lights too close together or spacing them too far apart creates uneven illumination and visual imbalance. Ignoring end clearances results in a cramped appearance.
Solution: Strictly follow the 24-30 inch center-to-center spacing and maintain 12-18 inches from island edges. Use temporary markers to visualize spacing before committing to installation.
Mistake #3: Hanging Lights at Wrong Height
Pendants hung too low obstruct views and create head-bumping hazards, while those hung too high fail to provide adequate task lighting.
Solution: Stick to the 30-36 inch guideline from countertop to fixture bottom. Test the height with adjustable cord before making final cuts.
Mistake #4: Inadequate Wattage
Choosing bulbs that are too dim leaves your workspace poorly lit, while overly bright bulbs create glare and harsh shadows.
Solution: Use 60-75 watt equivalent LED bulbs for pendants, and install dimmer switches to adjust brightness as needed. Consider the shade material—some block more light than others.
Mistake #5: Ignoring Kitchen Style
Selecting trendy fixtures that clash with your kitchen’s architectural style creates visual discord and may quickly feel dated.
Solution: Choose timeless designs that complement your existing aesthetic. Traditional kitchens pair beautifully with classic glass pendants, while contemporary spaces shine with geometric or industrial fixtures.
Mistake #6: DIY Electrical Work Without Proper Knowledge
Attempting electrical installation without understanding basic wiring principles poses serious safety risks including fire hazards and electric shock.
Solution: If you’re uncomfortable with electrical work, hire a licensed electrician. The cost of professional installation is minimal compared to potential safety issues and ensures compliance with building codes.
Maintenance / Upkeep Tips
Regular Cleaning Routine:
Dust pendant fixtures weekly using a microfiber cloth or duster to prevent buildup. Monthly, turn off power and remove shades or globes for thorough cleaning with appropriate cleaners—glass cleaner for glass shades, mild soap and water for metal or fabric components. Dry completely before reinstalling.
Bulb Replacement Strategy:
LED bulbs last 15,000-25,000 hours but will eventually need replacement. Keep spare bulbs on hand and replace all pendants simultaneously to maintain consistent color temperature and brightness across fixtures. This prevents the mismatched appearance that occurs when mixing old and new bulbs.
Connection Checks:
Annually, turn off power and check that all wire connections remain secure and that mounting hardware hasn’t loosened. Tighten any loose screws or connections. Look for signs of wear on cords and fixtures, addressing issues promptly.
Dimmer Switch Maintenance:
If your dimmer produces buzzing sounds or inconsistent performance, it may need replacement. Ensure you’re using dimmers compatible with your bulb type—LED bulbs require LED-compatible dimmers for optimal performance.
Style Updates:
As design trends evolve, you can refresh your kitchen’s look by simply swapping pendant shades rather than replacing entire fixtures. Many manufacturers offer interchangeable shades that provide a cost-effective update every few years.
Finish Protection:
For metal fixtures, apply appropriate polish or protective coating to prevent tarnishing. Brass and copper benefit from specialized cleaners, while stainless steel maintains its appearance with simple soap and water.
Conclusion
Determining How Many Lights Over a Kitchen Island involves careful consideration of island dimensions, proper spacing calculations, and thoughtful design choices that enhance both functionality and aesthetics. By following kitchen island lighting spacing guidelines—maintaining 24-30 inches between fixtures, allowing 12-18 inches of end clearance, and hanging pendants 30-36 inches above the countertop—you create a professionally designed lighting scheme that transforms your kitchen into a stunning, well-lit space. Whether you choose classic glass pendants, industrial metal fixtures, or contemporary geometric designs, the right number and placement of lights will elevate your kitchen’s appeal while providing the practical illumination you need for daily tasks. The investment in proper kitchen island lighting pays dividends through improved functionality, enhanced home value, and the simple pleasure of working in a beautiful, well-designed space.
Ready to illuminate your kitchen island with perfectly spaced pendant lights? Start measuring your island today, use our guidelines to calculate your ideal fixture quantity and spacing, and transform your kitchen into the stunning, functional heart of your home. Don’t forget to share your lighting transformation with us—we’d love to see how you’ve applied these professional techniques to create your dream kitchen!
FAQs
Q1: Can I use different sized pendants over my kitchen island?
Yes, using varied pendant sizes creates visual interest in eclectic or modern kitchens. However, maintain consistency in style, finish, or material to ensure cohesion. A popular approach uses a larger statement pendant in the center flanked by smaller matching fixtures, or varies heights rather than sizes for dramatic effect.
Q2: Should pendant lights be centered over the island or the countertop?
Always center pendant lights over the countertop surface rather than the island base. If your island includes an overhang for seating, the overhang should not factor into your centering calculations—focus only on the main countertop area where you’ll perform tasks.
Q3: How do I light a curved or L-shaped kitchen island?
For curved islands, follow the curve with pendant placement, maintaining consistent spacing between fixtures. L-shaped islands require treating each leg separately—determine the appropriate number of lights for each section based on its length, then apply standard spacing guidelines to each segment independently.
Q4: What’s the minimum wattage needed for kitchen island task lighting?
For adequate task lighting, aim for 60-75 watt equivalent per pendant (or 450-600 lumens for LED bulbs). For a three-pendant setup, this provides approximately 180-225 total watts equivalent, sufficient for most kitchen tasks when combined with ambient lighting from other sources.
Q5: Do I need the same number of lights as I have stools at my island?
Not necessarily. While some designers align one pendant per stool for symmetry, lighting requirements should prioritize island length and functional illumination rather than seating count. A 6-foot island might have three bar stools but only need two well-spaced pendants for adequate lighting, or vice versa.